
Fabric drawstring pouch pattern is a practical sewing project that turns a few simple pieces of fabric into a useful, reusable, and attractive storage bag.
This Fabric drawstring pouch pattern is also an excellent opportunity to use cotton remnants and leftover pieces from previous sewing projects.
The tutorial below explains how to create the pouch from preparation through final assembly, including suggested measurements, seam allowances, casing construction, pressing, turning, and drawstring installation. The focus is not simply on completing the bag but on understanding why each construction step matters. Accurate cutting helps the corners line up, consistent seam allowances keep both sides symmetrical, and careful pressing gives the finished pouch a crisp shape. Once you understand these basic techniques, the fabric drawstring pouch can become a dependable pattern that you can resize and personalize for many different purposes.
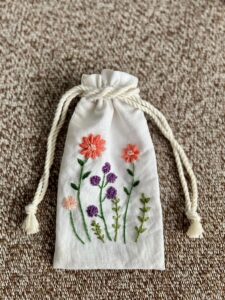
Materials, Measurements, and Preparation for the Fabric Drawstring Pouch Pattern
For a beginner-friendly medium pouch, prepare two rectangles of outer fabric measuring approximately 10 x 12 inches (25.5 x 30.5 cm) and two rectangles of lining fabric in the same size. Medium-weight quilting cotton is particularly convenient because it cuts cleanly, presses easily, and is sturdy without becoming bulky. You will also need matching thread, scissors or a rotary cutter, pins or sewing clips, an iron, a sewing machine, and a safety pin or bodkin for inserting the drawstring.
The lining fabric gives the pouch a clean interior and hides most of the raw seam allowances. Although an unlined bag can be made more quickly, adding lining creates a noticeably more finished project. Choose a lining that complements the outer material while still offering enough contrast to make the inside easy to see. If your outer fabric is particularly lightweight, a thin fusible interfacing can also be added for structure, although it is optional for a soft drawstring pouch.
Prepare two pieces of cord or ribbon measuring approximately 26 to 30 inches (66 to 76 cm) each. Having two drawstrings allows the pouch to close evenly when pulled from opposite sides. Cotton cord provides a natural handmade appearance, while grosgrain ribbon can produce a softer decorative finish. Whatever material you select, make sure it moves smoothly through the casing without being so thin that it disappears inside the channel.
Before cutting, press the fabric thoroughly to eliminate folds and wrinkles. Accurate cutting is one of the simplest ways to improve a sewing pouch pattern, because even a small difference between the front and back pieces can create uneven edges during assembly. If the fabric has a directional print, check its orientation before cutting. The design should point toward the upper opening of the finished pouch rather than accidentally appearing upside down.
Use a consistent seam allowance throughout the project. A 3/8-inch (1 cm) allowance works well for this pattern, although 1/2 inch (1.3 cm) can also be used if you prefer a slightly wider seam. Marking the important casing points before sewing can prevent mistakes later. Measure approximately 1 1/2 to 2 inches (4 to 5 cm) down from the upper edge on both sides of the outer fabric and make small removable marks.
If you want to change the size of the pouch, the same construction method still applies. For a small gift pouch, pieces around 6 x 8 inches can work nicely, while a larger craft bag might begin with rectangles measuring 14 x 16 inches or more. Remember that the finished dimensions will be smaller than the original pieces because of the seams and upper casing. This ability to scale the Fabric drawstring pouch pattern is one reason it is such a useful basic sewing project.
Step-by-Step Sewing and Assembly of the Fabric Drawstring Pouch
Begin by placing the two outer fabric pieces right sides together, carefully aligning all four edges. Pin or clip around the sides and bottom. Sew down one side, across the bottom, and up the opposite side using your chosen seam allowance. However, leave the previously marked casing areas unstitched near the top of both side seams. These small openings will eventually allow the drawstrings to enter and exit the casing.
Repeat a similar process with the lining pieces. Place them right sides together and stitch both sides and the bottom, but leave a 3-inch opening along the bottom edge. This turning opening is essential because the complete pouch will eventually be pulled through it. Backstitch at both ends of the opening so that the stitches remain secure while the fabric is being turned.
Press the seams open wherever possible. Pressing during construction is one of the most important habits for producing a professional-looking handmade bag. Instead of waiting until the entire pouch is finished, press after each important seam. Around the drawstring openings, carefully press the seam allowances apart so that the edges remain flat. This preparation will make the casing easier to stitch and will help prevent the cord from catching on excess fabric.
Now place the outer pouch inside the lining so that the right sides of both fabrics face each other. Match the upper raw edges and align the side seams. Pin around the entire opening, distributing the fabric evenly. Sew continuously around the upper edge. Take your time when crossing the side seams because several layers of fabric meet in these areas, and maintaining a consistent seam allowance will help keep the opening symmetrical.
Reach through the opening left in the bottom of the lining and gently pull the outer pouch through. Continue turning until both the outer fabric and lining are completely right side out. Push out the corners carefully with a blunt turning tool, taking care not to pierce the fabric. Fold the raw edges of the lining opening inward and close them with a narrow machine stitch or an invisible hand stitch for a cleaner finish.
Push the lining into the outer pouch and press the upper edge carefully. At this stage, the project should already resemble a finished bag, but the drawstring channel still needs to be formed. Make sure the lining sits smoothly inside without twisting. Proper alignment here is especially important because the final rows of topstitching will be visible from the exterior of your fabric drawstring pouch.
Creating the Drawstring Casing and Finishing the Pouch
To form the drawstring casing, stitch one horizontal line around the entire pouch slightly above the side openings. Sew another parallel line slightly below the openings. The space between these two rows becomes the channel through which the cords will travel. Depending on the cord thickness, a casing approximately 3/4 to 1 inch (2 to 2.5 cm) wide is usually comfortable.
Keep both rows of stitching parallel to the upper edge. You can use markings on the sewing machine’s throat plate or apply removable fabric guidelines before stitching. Straight, evenly spaced topstitching gives the Fabric drawstring pouch pattern a noticeably more polished appearance. Begin each row near a side seam and backstitch carefully at the beginning and end to prevent the stitches from loosening.
Attach a safety pin to one end of the first cord. Insert it through one casing opening and guide it around the entire pouch until it exits from the same side where it entered. Both ends of the first cord should therefore be positioned together. Tie them securely with a knot, leaving enough length to comfortably pull the pouch closed without creating unnecessarily long tails.
Take the second cord and begin from the opening on the opposite side. Again, feed it completely around the casing until it exits beside its starting point. Knot those two ends together. You should now have one loop emerging from each side of the pouch. When you pull the two loops away from each other, the upper fabric should gather evenly toward the center and close the bag.
Test the closure several times. If the cord feels difficult to pull, check whether the casing is too narrow or whether a seam allowance has folded into the channel. The drawstrings should move freely without excessive resistance. If necessary, work the gathers gently with your fingers to distribute them evenly. A smooth closure is an important functional detail of a successful drawstring bag sewing project.
Give the completed pouch one final press, avoiding direct high heat on synthetic ribbon or cord. Check the seams, trim loose thread ends, and make sure the lining remains flat inside the bag. At this point, the basic Fabric drawstring pouch pattern is complete. The result should be a lightweight yet practical pouch with a neatly lined interior, strong seams, a defined casing, and a closure that can be opened and tightened repeatedly.
Customization Ideas, FAQ, and Final Sewing Tips
Once you understand the basic construction, customization becomes one of the most enjoyable parts of this project. Try combining a printed upper section with a solid lower panel, adding a small fabric label, or using contrasting thread for decorative topstitching. Patchwork fabric scraps can also be joined together before cutting the main rectangles, transforming leftover material into a completely unique outer fabric.
Another option is to create boxed corners for additional depth. Before turning the outer bag right side out, flatten each bottom corner so that the side seam aligns with the bottom seam. Measure approximately 1 to 1 1/2 inches from the point, draw a line across the corner, and stitch along it. Trim the excess fabric while maintaining a safe seam allowance. Repeat on the lining so both sections have matching dimensions.
For a sturdier pouch, apply fusible interfacing to the wrong side of the outer pieces before assembly. Lightweight interfacing preserves flexibility, while medium-weight interfacing creates a bag that stands more independently. The appropriate choice depends on how you plan to use the finished pouch. A gift bag can remain soft, whereas an organizer for sewing notions may benefit from additional structure.
Fabric choice also influences the final appearance. Quilting cotton is beginner-friendly, but linen blends can create a natural rustic finish. Lightweight canvas produces more structure, although thicker materials may require a larger casing and stronger cord. Avoid combining extremely heavy outer fabric with very delicate lining because differences in weight can make the layers difficult to align during construction.
When making several pouches, create a reusable paper or cardboard template based on your preferred dimensions. A template helps maintain consistency and makes batch sewing considerably faster. You can also prepare several sets of pieces before beginning assembly, then complete each construction stage across all the pouches. This method is useful when creating handmade fabric gift bags, organizers, or coordinated storage sets.
The most important finishing principle is accuracy rather than speed. Check measurements before cutting, maintain consistent seam allowances, press carefully, and test the casing before considering the project complete. Small improvements in these areas can dramatically change the appearance of a simple sewing project. The beauty of this Fabric drawstring pouch pattern comes from combining straightforward construction with thoughtful finishing details.
FAQ About the Fabric Drawstring Pouch Pattern
What is the best fabric for a drawstring pouch?
Medium-weight cotton is one of the easiest choices, particularly for beginners. Quilting cotton is stable enough to sew accurately while remaining flexible enough to gather around the drawstring. Linen blends and lightweight canvas can also work when you want a different texture or greater structure.
How much fabric do I need for one pouch?
For the medium dimensions described in this tutorial, relatively small pieces are sufficient. You need two outer rectangles and two lining rectangles measuring approximately 10 x 12 inches each. This makes the project especially suitable for fabric remnants left from larger sewing projects.
Can I make the pouch without lining?
Yes. An unlined version can be made by finishing the internal seam allowances with a zigzag stitch, overlock stitch, or another appropriate seam finish. However, a lining hides raw edges and generally produces a cleaner interior, which is why it is included in this Fabric drawstring pouch pattern.
Why does my drawstring get stuck inside the casing?
A cord may become difficult to move if the casing is too narrow, if the cord is too thick, or if seam allowances extend into the channel. Before inserting the second cord, test the first one to ensure it travels freely. Pressing the side seam allowances open before creating the casing can also reduce this problem.
How do I calculate dimensions for a different pouch size?
Start with your desired finished width and height, then add seam allowances to the sides and bottom plus additional fabric at the top for the casing construction. When experimenting with a significantly different size, creating a simple test version from inexpensive cotton can help confirm the proportions before cutting special fabric.
Can beginners make this sewing project?
Yes. This is a suitable beginner sewing project because most of the construction uses straight stitching. The areas that deserve the most attention are leaving the casing openings correctly positioned, maintaining an even seam allowance, and creating parallel topstitching around the upper portion.
Can ribbon replace cotton cord?
Ribbon can work very well, particularly for decorative gift pouches. Select ribbon that is narrower than the finished casing so it can move without catching. Grosgrain ribbon is relatively durable, while softer ribbons can create a more delicate appearance.
How can I make the bottom of the pouch wider?
Add boxed corners during construction. Stitching across flattened bottom corners transforms the pouch from a flat bag into a three-dimensional container. Larger boxed corners create greater depth but also reduce some of the finished height and width, so consider this when choosing the original measurements.
Should I prewash the fabric before sewing?
Prewashing is helpful when the finished pouch is likely to be washed later, especially when using cotton fabrics that may shrink. Wash and dry the material according to its care requirements, then press it before measuring and cutting. This reduces the possibility of unexpected shrinkage after the pouch has been completed.
How can I make my handmade pouch look more professional?
Focus on accurate cutting, consistent seam allowances, careful pressing, neat topstitching, and clean thread trimming. These details matter more than complicated decoration. Coordinating the outer fabric, lining, thread, and drawstring can also give the finished piece a more intentional appearance.
Conclusion
The Fabric drawstring pouch pattern demonstrates how basic sewing techniques can be combined to create something practical, attractive, and highly customizable. Starting with simple fabric rectangles, you learned how to prepare the outer fabric and lining, sew the main seams, preserve openings for the casing, turn the project correctly, and finish the interior neatly.You also learned how to create a functional drawstring casing, install two cords from opposite directions, adjust the closure, and improve the finished project through careful pressing and topstitching. These skills are useful beyond this particular pattern and can be applied to many other handmade bags, organizers, and fabric accessories.
Once you have completed the basic version, experiment with different dimensions, contrasting fabrics, boxed corners, interfacing, patchwork panels, ribbons, and decorative details. The simple construction gives you plenty of freedom to develop your own variation while maintaining the essential structure of the pouch.
Most importantly, take your time with each stage and enjoy the process of transforming flat pieces of fabric into a useful handmade item. If you try this Fabric drawstring pouch pattern, leave your sincere opinion about the project and share any suggestions or creative changes you would make. Your ideas can inspire new variations and make the sewing experience even more interesting for everyone who enjoys creating practical projects by hand.