
Crocheted Halloween pinwheel pattern is a fun and colorful crochet project that combines classic pinwheel-inspired shaping with the playful atmosphere of Halloween.
The most interesting characteristic of this Crocheted Halloween pinwheel pattern is the way separate color sections appear to rotate around a central point.
For this tutorial, the crochet instructions are presented using standard crochet stitch keys so that each stage is easy to identify. The main abbreviations are MR = magic ring, ch = chain, sc = single crochet, hdc = half double crochet, dc = double crochet, sl st = slip stitch, inc = increase, st = stitch, sts = stitches, sp = space, rep = repeat, and FO = fasten off. The exact finished dimensions can vary according to yarn weight, hook size, and individual tension, so consider the stitch counts a structured foundation while paying attention to the appearance of your own work. Reading the complete instructions before beginning will also make the color sequence and shaping process easier to understand.
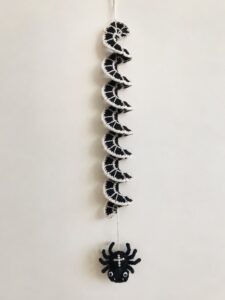
Materials and Crochet Stitch Keys for the Halloween Pinwheel
For the Crocheted Halloween pinwheel pattern, choose three or four coordinating colors of cotton or acrylic yarn in DK or worsted weight. A classic combination uses orange, black, purple, and bright green, but you can also introduce cream, gray, burgundy, or mustard for a softer autumn appearance. Approximately 10 to 20 grams of each color should be enough for a small motif, although larger versions naturally require more yarn. You will also need a crochet hook appropriate for your selected yarn, scissors, a yarn needle, and several stitch markers.
A hook between approximately 3.5 mm and 4.5 mm works well with many medium-weight yarns, but always consider the yarn label and your personal crochet tension. For decorative pieces, the goal is to create fabric that is firm enough to maintain the pinwheel shape without becoming excessively stiff. If your stitches are extremely tight, moving up one hook size can make shaping easier. If the motif feels loose and lacks definition, try a slightly smaller hook while making sure the fabric still lies comfortably flat.
Before starting, review the essential crochet abbreviations. Use MR for magic ring, ch for chain, sc for single crochet, hdc for half double crochet, dc for double crochet, sl st for slip stitch, inc for an increase, st for one stitch, sts for multiple stitches, sp for space, and FO for fasten off. When the instructions say inc, work two stitches into the same stitch unless another specific combination is provided.
The central foundation begins with a magic ring. Using your first Halloween color, make MR, ch 1, work 8 sc into MR, pull the ring closed, sl st into the first sc [8 sts]. This creates a compact center with enough stitches to establish several pinwheel sections. Do not pull your working stitches too tightly around the center because you will need to identify them clearly when introducing additional colors.
For the second round, work ch 1, 2 sc in each st around, sl st to join [16 sts]. This is a basic increase round that doubles the number of stitches while keeping the center flat. If you want the center to contain multiple colors, you can alternate yarn shades around this round, but beginners may find it easier to create the foundation in one color before introducing contrasting sections.
Place the small circle on a flat surface before proceeding. It should resemble a neat disk without strong curling or rippling. A slight curve can usually be corrected as additional rounds are worked, but dramatic cupping indicates that the tension may be too tight or that the stitch distribution needs adjustment. Once the foundation is stable, you are ready to create the colorful sections that give the Halloween crochet pinwheel its recognizable rotating appearance.
Step-by-Step Crochet Pattern for Creating the Pinwheel Sections
Divide the 16 stitches from the foundation into four equal groups of four stitches and mark the beginning of each group with a stitch marker. These four groups will become the major color sections of the Crocheted Halloween pinwheel pattern. Assign one yarn color to each section—for example, orange, black, purple, and green. Keeping the sections organized from the beginning makes it much easier to maintain the spiral arrangement as the motif grows.
Attach orange yarn to the first marked section. Work ch 1, sc in first st, hdc in next st, dc in next st, 2 dc in final st [5 sts across the section]. Fasten off or leave the yarn attached if you are comfortable managing several working strands. The gradual progression from sc to hdc and dc creates the first directional wedge that contributes to the impression of movement.
Attach black yarn to the beginning of the second marked group and repeat sc, hdc, dc, 2 dc across its four foundation stitches. Repeat the same sequence with purple across the third section and green across the fourth. At the end of this stage, you should see four small wedges arranged around the center. Keep the direction of every section consistent so they appear to rotate together rather than pointing randomly.
For the next expansion row of each wedge, work ch 1, sc in first st, hdc in next st, dc in next 2 sts, 2 dc in final st. Repeat this construction separately across every colored section. The extra stitch at the outside edge gradually expands each wedge and creates the characteristic fan-like shape. Count carefully after completing each section because one accidental increase can noticeably change the symmetry of a small crochet motif.
Continue expanding each wedge using the same principle: shorter stitches near one side, progressively taller stitches toward the other side, and a controlled increase near the outer edge. A typical following row can be sc in first st, hdc in next 2 sts, dc across the middle stitches, 2 dc in final st. The precise middle stitch count increases as the motif becomes larger, but all four sections should follow the same construction to maintain visual balance.
After completing several expansion rows, arrange the motif on a table and gently guide every wedge in the same rotational direction. You should now clearly recognize the crochet pinwheel pattern. If one section appears noticeably larger than another, recount its stitches before continuing. Small differences can sometimes be corrected in the next row, but maintaining matching stitch counts across corresponding sections provides the cleanest finished result.
Shaping, Joining, and Adding Halloween Details
Once the colored wedges have reached your preferred size, the next step is to visually connect them. Using black yarn, attach your hook at the outer edge of one section and work a relaxed round of sc around the entire motif. At the transition between two wedges, place one sc into each available edge stitch without forcing extra stitches into the same space. This border unifies the individual colors and creates a stronger outline around the Crocheted Halloween pinwheel pattern.
If the border begins to ripple, you are probably adding too many stitches along the edges. If it pulls inward and causes the pinwheel to cup, additional stitches may be necessary or your border tension may be too tight. Because edge stitches do not always correspond perfectly to conventional round stitch counts, focus on spacing them consistently. Stop occasionally and place the piece on a flat surface to evaluate the result before completing the entire border.
A second decorative border can add more Halloween personality. Try (sc in next 2 sts, ch 1, skip no stitches, sc in next 2 sts) around the edge for a subtle texture, or simply use a contrasting round of slip stitches. Orange against black creates strong contrast, while purple and green produce a playful seasonal palette. Keeping the edging relatively flat makes the finished motif more versatile for different decorative uses.
You can also embroider small details onto the colored sections. Simple straight stitches can create tiny spiderweb-inspired lines, while short surface stitches can add dots, stripes, or miniature stars. Avoid bulky embellishments if you plan to use the motif on a flat surface. The goal is to enhance the Halloween crochet decoration without hiding the pinwheel structure that makes the project distinctive.
Another attractive option is to emphasize the center. Using black or another contrasting shade, create a small surface-crochet circle around the original magic ring. Alternatively, thread a yarn needle and embroider a neat ring around the center. This visual outline helps separate the central point from the rotating wedges and can make the colors appear more defined.
When all decorative details are complete, turn the work over and weave in every yarn tail. Pass each end through several nearby stitches, reverse direction, and weave through another small section before trimming. Avoid leaving bulky knots on the back. A neatly finished reverse side is especially useful when the Crocheted Halloween pinwheel pattern will be used as an appliqué, hanging ornament, garland component, or visible table decoration.
Finishing, Customizing, and Decorating With Your Crochet Pinwheel
Blocking is one of the easiest ways to improve the final appearance of your Crocheted Halloween pinwheel pattern. Follow the care instructions for your chosen yarn, gently reshape the finished motif, and arrange each wedge so the sections appear evenly distributed. Allow the piece to dry completely in the desired shape. Proper blocking can improve stitch definition and correct minor irregularities, although major stitch-count problems should be fixed before finishing.
Color customization offers almost unlimited possibilities. For a classic Halloween version, combine black, pumpkin orange, purple, and green. For a more understated autumn look, try rust, cream, dark brown, and mustard. A dramatic version could use mostly black with small sections of orange and purple. Whatever combination you select, repeating colors in a consistent order helps preserve the visual rhythm of the pinwheel.
The size is also easy to modify. To create a miniature pinwheel, stop after only a few wedge rows and finish with a simple border. For a larger decorative motif, continue expanding every section equally, adding one or more stitches to the middle portion while maintaining the gradual transition from shorter to taller stitches. Measure frequently so that one section does not become larger than the others.
Several finished pinwheels can be combined into a coordinated Halloween decoration. Small motifs can be attached to a crocheted chain to create a garland, while individual pieces can decorate fabric bags, handmade baskets, table settings, or seasonal wall displays. When attaching the motif to another handmade item, sew around the outer border with matching yarn so the stitches remain discreet and secure.
If you want a more dimensional effect, lightly fold the outer point of each wedge toward the center and secure it with a few hidden stitches. This creates a stronger traditional pinwheel appearance. For a flat motif, simply leave the wedges open after blocking. Both styles use essentially the same Crocheted Halloween pinwheel pattern, so you can experiment with the finishing method without changing the basic construction.
The most important part of customizing this pattern is maintaining consistency. Whenever you add a row, increase, border detail, or decorative stitch to one section, repeat the same treatment on the remaining sections unless asymmetry is intentional. Careful repetition creates a polished handmade appearance and makes the spiral effect easier to recognize. Once you understand this principle, the basic pattern can be adapted into many creative seasonal variations.
FAQ – Frequently Asked Questions About the Crocheted Halloween Pinwheel Pattern
Is the Crocheted Halloween pinwheel pattern suitable for beginners?
Yes. The project is suitable for adventurous beginners who are comfortable with single crochet, half double crochet, double crochet, increases, slip stitches, and color changes. Working with several sections requires careful counting, so stitch markers can be especially helpful during the first attempt.
What yarn is best for a crochet Halloween pinwheel?
Cotton and acrylic yarn can both work well. Cotton provides crisp stitch definition and tends to highlight the shape clearly, while acrylic offers a wide selection of colors and can create a softer decorative motif. Select a fiber according to how you intend to use and care for the finished project.
Which colors work best for Halloween?
Orange, black, purple, and green are popular choices because they immediately create a recognizable seasonal palette. Cream, gray, burgundy, mustard, and dark brown can also be incorporated for a more subtle autumn-inspired variation.
Why is my crochet pinwheel curling?
Curling is commonly associated with tight tension, insufficient increases, or an overly tight border. Place the motif flat after each stage. If it forms a bowl shape, consider relaxing your tension or carefully adjusting the stitch count. Minor curling may improve after blocking.
Why is my pinwheel becoming wavy?
Strong waves often indicate too many increases or too many stitches around the outer border. Check each section to make sure its stitch count matches the corresponding sections. Removing unnecessary edge stitches can help the motif return to a flatter shape.
Can I make the pinwheel larger?
Yes. Continue adding expansion rows to every wedge. Keep the increase pattern consistent and add stitches gradually rather than making several increases at once. Measure the sections frequently to maintain symmetry.
Can I make a smaller version?
Yes. Use lighter yarn, a smaller appropriate hook, or simply complete fewer expansion rows. Miniature versions are especially useful for appliqués, garlands, gift decorations, and other small seasonal craft projects.
Do I need four different yarn colors?
No. Four colors make the rotating sections easy to distinguish, but the design can be created with two alternating colors, three colors, or even one main shade with contrasting borders. The shaping technique creates the pinwheel effect even when the color palette is simplified.
How do I keep all the sections the same size?
Use stitch markers, count every row, and repeat exactly the same increase sequence for each wedge. It can also help to complete one row on all four sections before beginning the next row. This prevents one wedge from accidentally receiving an additional expansion row.
Can I add Halloween decorations to the finished motif?
Yes. Small embroidered spiderwebs, simple surface stitches, tiny crocheted accents, or contrasting borders can personalize the design. Keep decorative additions securely attached and appropriate for the intended use of the finished item.
How should I finish the back neatly?
Weave each yarn tail through several stitches using a yarn needle, change direction, and weave through another section before trimming. Avoid large knots because they can create unnecessary bulk. Taking extra time with the finishing process gives the project a cleaner appearance on both sides.
How can I make the pinwheel effect more noticeable?
Use contrasting colors and maintain the same directional stitch progression in every wedge. Working from sc to hdc to dc helps create a gradual visual movement. A dark outer border can further define the silhouette and separate the motif from its background.
Conclusion
The Crocheted Halloween pinwheel pattern is an enjoyable seasonal project that transforms familiar crochet stitches into a colorful motif with an interesting sense of movement. Starting with a magic ring, the project develops through controlled increases before being divided into colorful sections. By using sc, hdc, dc, sl st, ch, and carefully positioned increases, each wedge gradually develops into part of the recognizable pinwheel structure.Throughout the tutorial, we explored how to establish the central foundation, divide the stitches into equal groups, crochet matching wedges, create a clean border, add Halloween-inspired details, weave in the yarn ends, and block the finished piece. We also looked at practical ways to adjust the dimensions and color combinations while keeping the construction balanced. Accurate stitch counting and consistent tension remain two of the most important techniques for achieving a neat result.
The finished Halloween crochet pinwheel can be personalized in many ways, from a traditional orange-and-black combination to colorful purple, green, cream, and autumn-inspired variations. Once you understand how the wedges expand, you can use the same fundamental technique to experiment with miniature motifs, larger decorations, appliqués, garlands, and coordinated seasonal sets.
Most importantly, enjoy the creative process and allow your own style to influence the finished project. Handmade crochet does not need to look mechanically perfect; small variations are part of what gives each piece its individual character. If you try this Crocheted Halloween pinwheel pattern, leave your sincere opinion about the project and share your suggestions, favorite color combinations, or ideas for future variations.