
A Crochet leaf pattern is a wonderful way to bring the beauty of nature into handmade projects, adding delicate details, attractive textures, and charming shapes to your crochet creations.
One of the best things about a Crochet leaf pattern is its versatility. You can use green cotton yarn to create traditional botanical leaves, choose autumn shades for seasonal decorations, or experiment with bright colors for playful and modern projects.
This guide explains how to make a Crochet leaf pattern step by step, including the materials you need, the essential stitches, and the instructions for shaping a symmetrical leaf with a pointed tip. You will also learn how to create a central vein, adjust the size of your motif, troubleshoot common mistakes, and incorporate your finished leaves into other handmade projects. The instructions use standard US crochet terminology and include written abbreviations so you can follow the pattern comfortably. Although the design is beginner-friendly, it also provides opportunities to experiment with stitch placement, yarn texture, and decorative finishes. By the end, you will have the knowledge to create your own crochet leaves and adapt the pattern to suit your creative ideas.
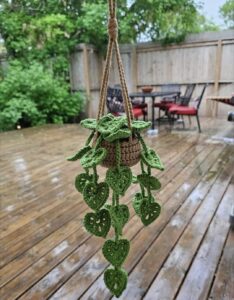
Materials, Crochet Stitches, and Preparation for Your Crochet Leaf Pattern
Before starting your Crochet leaf pattern, gather the necessary supplies and choose a yarn that makes the stitches easy to see. Worsted-weight cotton yarn is an excellent choice for beginners because it holds its shape well and produces clearly defined stitches. DK-weight yarn is another suitable option for smaller, more delicate leaves. Green is a traditional color, but olive, sage, mustard, rust, brown, and burgundy can create beautiful variations for different seasons. You will also need a crochet hook appropriate for your yarn, scissors, a yarn needle, and a stitch marker if you prefer extra help keeping track of your stitches.
Choosing the correct crochet hook can make a noticeable difference in the appearance of your leaf. A hook that is too large may produce loose stitches that make the leaf floppy, while a hook that is too small may create a stiff motif that is difficult to shape. Check the yarn label for a recommended hook size, then make a few practice stitches to see how the fabric feels. For a decorative leaf, slightly firm stitches usually help the finished piece maintain its outline. However, avoid pulling the yarn too tightly, especially when working several stitches into the same chain, because excessive tension can make the leaf curl or become difficult to complete.
Understanding the basic stitches will help you follow the Crochet leaf pattern with confidence. The main stitches used in this project are the chain stitch (ch), slip stitch (sl st), single crochet (sc), half double crochet (hdc), double crochet (dc), and treble crochet (tr). These stitches create different heights, allowing the leaf to have a narrow point at each end and a wider middle section. A chain creates the foundation, while taller stitches build the rounded sides. Single crochet and slip stitch help define the narrow tips and secure the finishing details. If you already know how to make a basic crochet square or flower, you will likely recognize most of these techniques.
For this pattern, the finished leaf will measure approximately 2 to 3 inches long when made with medium-weight yarn and a suitable hook. The exact dimensions will vary according to your yarn, tension, and hook size, so consider the measurements a general guide rather than a strict requirement. You can make a smaller leaf by using thinner yarn and a smaller hook, or a larger leaf by choosing thicker yarn and adjusting the foundation chain. Keeping a consistent stitch tension is more important than achieving an exact measurement. If you plan to make several leaves for one project, using the same materials will help them look uniform when arranged together.
Before beginning, familiarize yourself with the following abbreviations used throughout the pattern:
- ch — chain stitch.
- sl st — slip stitch.
- sc — single crochet.
- hdc — half double crochet.
- dc — double crochet.
- tr — treble crochet.
- st — stitch.
- sts — stitches.
- inc — increase, meaning more than one stitch is worked into the same stitch or space.
The instructions are written in US crochet terminology. In UK terminology, the US single crochet is called a double crochet, the US double crochet is called a treble crochet, and the US treble crochet is called a double treble crochet. Checking the terminology before you start is important because stitch names differ between these systems. Once your supplies are ready and the abbreviations are familiar, you can move directly into the step-by-step instructions and begin shaping your leaf.
Step-by-Step Crochet Leaf Pattern Instructions
Step 1: Make the foundation chain. Begin with a slip knot on your crochet hook, then chain 12 stitches. This foundation chain determines the approximate length of your leaf, so you can increase or decrease the number of chains when you want a different size. Keep the chain relaxed rather than pulling each loop tightly. A flexible foundation makes it easier to work multiple stitches into the chain and helps the finished leaf lie flat. For your first attempt, use the recommended 12 chains so you can become familiar with the shaping process.
Step 2: Work the first side of the leaf. Starting in the second chain from the hook, work 1 slip stitch into the chain, followed by 1 single crochet into the next chain. Work 1 half double crochet into the following chain, then 2 double crochet stitches into each of the next two chains. These increases begin to create the widest part of the leaf. Next, work 1 treble crochet into each of the next two chains. You should now notice the stitches gradually increasing in height toward the middle of the motif, creating the characteristic pointed-to-rounded shape of a botanical leaf.
Step 3: Shape the center and pointed tip. Work 2 treble crochet stitches into the next chain to add fullness near the center of the leaf. Continue with 1 double crochet into the next chain and 1 half double crochet into the following chain. Finish this side by working 1 single crochet into the next available chain and 1 slip stitch into the final chain. If your stitch count or chain placement differs slightly because of your tension, focus on keeping the shape balanced. The precise placement of taller stitches creates a gradual curve, while the shorter stitches help narrow the outline.
Step 4: Work along the opposite side of the foundation chain. Rotate the work so you can crochet into the unused loops along the other side of the original chain. Do not turn the work as you would when starting a new row; instead, continue around the foundation to create an oval leaf shape. Begin with a slip stitch or single crochet near the narrow end, then use single crochet, half double crochet, double crochet, and treble crochet stitches in a roughly mirrored arrangement. Place the taller stitches toward the wider middle section and the shorter stitches near the opposite tip. Working along both sides of the foundation chain creates a leaf that has a continuous outer edge rather than two separate halves.
Step 5: Balance the second side. As you move along the opposite side, compare the height and width of the stitches with those on the first side. Work 1 treble crochet into the next suitable chain loop, followed by 1 or 2 double crochet stitches in the wider section. Use half double crochet and single crochet as you approach the narrow end. Adjust the number of stitches only when necessary to maintain a balanced outline. The objective is not to reproduce a mathematically perfect shape but to create a leaf that looks natural, with a fuller center and tapered ends. If the leaf begins to cup excessively, check whether you are using too much tension or placing too many stitches in one area.
Step 6: Complete the pointed end. When you reach the starting end of the leaf, use a slip stitch to connect the final stitches neatly and secure the outline. If the design needs a sharper point, work a short chain of two or three stitches at the tip and slip stitch back toward the leaf. This small detail creates a delicate extension that resembles the natural point of a leaf. Fasten off the yarn, leaving a tail long enough for weaving in or attaching the motif to another project. Use a yarn needle to hide the loose ends within the stitches, taking care not to pull the leaf out of shape.
Step 7: Add a central vein. A central vein gives the Crochet leaf pattern extra definition and makes the finished motif look more botanical. Thread a yarn needle with a matching or contrasting strand of yarn, then sew a line from the base of the leaf toward its pointed tip. Keep the stitches small and even, following the center of the motif. Alternatively, use surface slip stitches with your crochet hook to create a raised vein. For a natural appearance, choose a slightly darker shade of green, or use a lighter shade for subtle contrast. Avoid pulling the yarn too tightly, because the center may gather and cause the leaf to fold.
Step 8: Shape and finish the leaf. Lay the finished leaf on a flat surface and gently arrange its edges with your fingers. If necessary, lightly block the motif using a method suitable for your yarn. Cotton can often be shaped with careful moisture and gentle pinning, while acrylic yarn should not be exposed to excessive heat. Allow the leaf to dry completely before attaching it to a project. Once finished, examine both sides to check that the tips are secure, the edges are even, and no loose yarn tails remain. Your first leaf is now complete, and you can repeat the process to create a coordinated set.
Written Pattern Summary
For quick reference, the basic Crochet leaf pattern can be summarized as follows. The stitch placements below describe the general shaping sequence; the exact count may need slight adjustment depending on how you work around your foundation chain.
Foundation: Ch 12.
First side: Beginning in the second ch from the hook, work sl st, sc, hdc, 2 dc in each of the next 2 chains, 1 tr in each of the next 2 chains, 2 tr in the next chain, then dc, hdc, sc, and sl st across the remaining chains as space permits.
Opposite side: Work into the unused loops on the opposite side of the foundation chain, mirroring the progression from short stitches near the tip to taller stitches near the wider center, then back to shorter stitches at the other end.
Finishing: Join neatly, fasten off, weave in the ends, and optionally embroider a central vein.
Because this is an adaptable written pattern rather than a fixed stitch-count chart, count the available foundation loops before beginning and distribute the stitches to achieve a balanced shape. If you prefer a more symmetrical leaf, you can make a small practice sample and record your exact stitch placement for future repetitions.
Customizing Your Crochet Leaf Pattern and Using the Finished Leaves
One of the most enjoyable aspects of a Crochet leaf pattern is the opportunity to personalize the design. Changing yarn weight, hook size, stitch height, and color can produce noticeably different results without requiring an entirely new pattern. For a delicate flower embellishment, use fine cotton yarn and a smaller hook. For a decorative wreath, choose medium-weight yarn that creates a firm leaf with a clearly defined outline. If you want a soft, rustic appearance, try muted shades such as sage green, moss, or olive. For autumn decorations, mustard yellow, copper, burgundy, and brown can create a beautiful seasonal collection.
You can also change the shape by adjusting the foundation chain. A shorter chain produces a compact leaf, while a longer chain creates a more elongated motif. To make a rounded leaf, concentrate more stitches near the center and use a gentler transition between stitch heights. To create a narrow willow-like leaf, reduce the fullness around the middle and use a longer foundation. For a pointed botanical shape, keep the beginning and ending stitches short and gradually increase the height toward the center. Experimenting with these adjustments helps you develop a personal collection of leaf shapes suitable for different projects.
Texture is another effective way to make handmade leaves stand out. You can add a central vein with surface slip stitches, embroider short diagonal lines to suggest smaller veins, or work into selected loops to create subtle ridges. Raised stitches can give the motif a three-dimensional appearance, while a simple flat design works well for garments and blankets. If you want to combine several leaves into one arrangement, make some slightly larger than others to create visual variation. A combination of different sizes often looks more natural than a group of identical motifs arranged in a perfectly regular pattern.
A handmade leaf can become a decorative accent for many projects. Attach one to a crocheted flower to create a complete botanical motif, or sew several leaves onto a headband, bag, scarf, or cardigan. Small leaves also work beautifully as appliqués on cushions, blankets, table runners, and fabric accessories. For seasonal decorations, combine crocheted leaves with handmade pumpkins, flowers, or other nature-inspired motifs. When attaching a leaf to an item that will be handled frequently, use a yarn needle and secure the stitching through several points rather than fastening it only at the base.
For home decoration, a collection of crochet leaves can be arranged into a wreath, garland, wall hanging, or artificial plant. Make the leaves in different shades of green to imitate natural foliage, then use a consistent yarn weight so the pieces work well together. If you want to create a garland, sew the leaves along a crocheted chain or attach them individually to a length of yarn. Space them evenly for a simple design or group them in clusters for a fuller appearance. Before hanging a finished decoration, make sure all loose ends are secured and any small embellishments are firmly attached.
The Crochet leaf pattern can also help you practice skills that are useful in more advanced crochet projects. Working around a foundation chain develops your understanding of stitch placement, while changing stitch heights teaches you how to create curved shapes without complicated increases and decreases. Repeating the same motif improves consistency and helps you recognize how tension affects the final result. Keep notes about your hook size, yarn type, foundation chain, and stitch arrangement. These notes will make it easier to reproduce a favorite design later and help you build a personal library of handmade botanical patterns.
Troubleshooting, Care Tips, and Frequently Asked Questions About Crochet Leaf Patterns
Even a simple Crochet leaf pattern may require a little adjustment during your first attempt. One common problem is a leaf that curls along the edges. This can happen when the yarn tension is too tight, when the hook is too small, or when too many stitches are placed in one section. Try relaxing your grip, checking the hook size, and spreading the taller stitches more evenly. If the leaf remains slightly curled, gently shape it with your fingers and consider light blocking when appropriate for the fiber. A small amount of natural curvature can look attractive, but the motif should not be so distorted that its outline becomes difficult to recognize.
Another frequent issue is a leaf that looks uneven or asymmetrical. This usually happens when the stitch sequence on the second side does not sufficiently mirror the first side. Since the motif is worked around both sides of a foundation chain, it can be easy to lose track of the corresponding loops. Use a stitch marker near the beginning, count the stitches as you work, and compare both sides before fastening off. Remember that handmade leaves do not need to be perfectly identical to look beautiful. Small variations can make a collection feel organic, especially when the leaves are used together in a wreath or floral arrangement.
If your leaf looks too stiff, try using a slightly larger hook or a softer yarn. If it feels too floppy, a smaller hook or firmer stitch tension may help. The best adjustment depends on the fiber and the intended use. A leaf that will be sewn onto a blanket may benefit from a softer finish, while a motif intended for a structured decorative arrangement may need a firmer fabric. Test any change on a small sample before making a large set. This approach saves time and allows you to choose a combination of materials that suits the project.
Care also matters when using crochet leaves on finished items. Cotton motifs can often be gently hand-washed, but you should always consider the care instructions for the yarn and the item to which the leaf is attached. Acrylic yarn can be sensitive to high heat, so avoid ironing it directly or using excessive steam. If the leaf is sewn onto a garment, follow the garment’s washing instructions and secure the attachment before cleaning. Store delicate motifs flat when possible, and keep them away from sharp objects that could snag the yarn or pull out individual stitches.
Frequently Asked Questions
1. Is a crochet leaf pattern suitable for beginners?
Yes. A basic Crochet leaf pattern is suitable for beginners who know how to make chain stitches, slip stitches, and basic crochet stitches. The project is small, requires little yarn, and allows you to practice working around a foundation chain. Beginners can start with a simple flat leaf before experimenting with surface veins or more complex textures. If you are still learning taller stitches, practice them separately before beginning the full motif.
2. What yarn is best for crocheting leaves?
Cotton yarn is an excellent choice because it generally produces clear stitches and holds its shape well. Acrylic yarn is also suitable, particularly for decorative leaves used on blankets, garlands, or seasonal arrangements. Fine cotton creates delicate motifs, while thicker yarn produces larger, more substantial leaves. The best choice depends on the desired size, texture, and intended use.
3. How much yarn does one crochet leaf require?
A small leaf generally uses only a few yards of yarn, although the exact amount depends on the yarn weight, hook size, and dimensions of the motif. You can often make several small leaves from leftover yarn. If you plan to create a large garland or wreath, make one sample first and use it to estimate how much yarn you will need for the complete project.
4. Why does my crochet leaf curl?
Curling can result from tight tension, a hook that is too small, or too many stitches concentrated in one area. Check whether the taller stitches are distributed evenly along the wider section of the leaf. Relaxing your tension or adjusting the hook size may solve the problem. Gentle blocking can also help the motif lie flatter when the yarn permits it.
5. How can I make a larger crochet leaf?
To increase the size, use a longer foundation chain, a thicker yarn, or a larger hook. If you change the foundation chain, remember to redistribute the stitch heights so the leaf maintains a tapered shape. Making a sample before producing several leaves will help you determine the proportions that work best.
6. How do I make my crochet leaf look more realistic?
Choose a natural color, create a pointed tip, and gradually increase stitch height toward the middle. Adding a central vein with embroidery or surface slip stitches can improve the botanical appearance. You can also vary the leaf length and width to imitate different plant varieties. Slightly irregular shapes may look more natural than perfectly identical motifs.
7. Can I use a crochet leaf as an appliqué?
Yes. Crochet leaves work well as appliqués for blankets, scarves, bags, clothing, cushions, and other decorative items. Use a yarn needle to sew the leaf securely to the surface, paying particular attention to the base and the tip. If the item will be washed or handled frequently, check the attachment for loose stitches before use.
8. How do I attach crochet leaves to flowers?
Position the leaf behind or beside the flower and use a yarn needle to sew the base securely to the flower or its stem. For a layered design, overlap two or three leaves and adjust their angles before stitching. Make sure the attachment is firm without pulling the leaf into an unnatural shape. If the flower is part of a wearable item, avoid leaving long loose yarn tails.
9. Can I make crochet leaves in colors other than green?
Absolutely. Green is traditional, but yellow, orange, brown, red, cream, and burgundy are excellent choices for autumn crafts and decorative arrangements. Pastel shades can create a delicate appearance, while bright colors work well for playful accessories. Choosing colors that coordinate with the rest of your project will help the finished leaves look intentional.
10. How do I keep several crochet leaves the same size?
Use the same yarn, hook, foundation chain, and stitch sequence for every leaf. Keep your tension consistent and count the stitches on both sides of the foundation chain. You may find it helpful to write down the exact sequence that produced your favorite sample. If necessary, measure the first finished leaf and compare subsequent pieces as you work.
11. What is the difference between a flat and a three-dimensional crochet leaf?
A flat leaf is generally worked as a single motif and is ideal for appliqués, blankets, and other projects that need a low-profile decoration. A three-dimensional leaf may use raised stitches, surface details, shaping, or additional layers to create more depth. Flat leaves are often easier for beginners, while textured designs offer more opportunities for advanced experimentation.
12. Can I sell items made using my crochet leaf pattern?
You can generally use handmade crochet leaves in your own finished craft products, but any specific pattern’s terms, yarn manufacturer’s instructions, or applicable intellectual property rules should be considered when relevant. If you develop your own written instructions, make sure your description accurately reflects your work. Keep your product descriptions honest about the materials, dimensions, and handmade nature of each item.
Conclusion
Creating a Crochet leaf pattern is a rewarding way to explore the versatility of crochet while making attractive botanical decorations for everyday crafts. In this guide, you learned how to choose suitable materials, understand the essential crochet abbreviations, work around a foundation chain, shape a pointed leaf, and add a central vein for extra detail. You also discovered how to adjust the size, experiment with colors and textures, attach leaves to other projects, and solve common problems such as curling and uneven shaping.
The most important part of learning this pattern is to practice patiently and enjoy the creative process. Your first leaf may look slightly different from your next one, but each attempt will help you develop more consistent stitches and a better understanding of shape. Once you feel comfortable with the basic instructions, experiment with different yarns, stitch arrangements, and decorative finishes to create leaves that reflect your personal style.
Now it is your turn to bring your ideas to life! Try this Crochet leaf pattern, create a few variations, and see how they look in your favorite handmade projects. If you have already crocheted leaves or have suggestions for improving this pattern, please leave your honest opinion and suggestions in the comments. Your experience and creative ideas may inspire other crocheters to try the project, learn a new technique, and discover even more ways to enjoy handmade crafts.