
Crochet teddy bear jewelry box pattern is a delightful project that combines the charm of amigurumi with the practicality of a handmade storage container.
One of the best aspects of this Crochet teddy bear jewelry box pattern is its versatility. You can customize the teddy bear using different yarn colors, embroidered facial expressions, bows, flowers, or decorative accessories to create a completely unique piece.
Throughout this tutorial, you will learn how to crochet the teddy bear-shaped jewelry box from start to finish using clear stitch instructions and construction techniques. Each section explains the process step by step, including creating the base, crocheting the container, shaping the teddy bear lid, assembling all the parts, and adding the finishing details. By carefully following these instructions, you can create a beautiful handmade keepsake that is both decorative and useful for everyday organization.
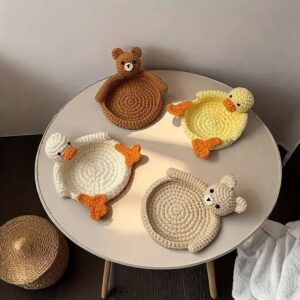
Materials and Basic Crochet Stitches
Before beginning your Crochet teddy bear jewelry box pattern, gather all your materials. Medium-weight cotton yarn works especially well because it provides excellent stitch definition and creates a sturdy finished box. Acrylic yarn may also be used if you prefer a softer texture. You will also need a matching crochet hook, fiberfill stuffing, stitch markers, embroidery thread, yarn needle, scissors, and optional safety eyes if the project is intended for decorative use.
The foundation of this project starts with a magic ring. The magic ring allows the base of the jewelry box to close tightly without leaving a hole in the center, creating a neat and professional appearance.
Round 1: Make a Magic Ring, crochet 6 single crochet (sc) into the ring, then pull it closed tightly. Join with a slip stitch if working joined rounds or continue in a spiral if preferred. (6 sts)
Round 2: Work 2 sc in each stitch around. (12 sts)
Round 3: 1 sc, increase around. Repeat six times. (18 sts)
Continue increasing in this manner until the circular base reaches approximately 5 to 6 inches in diameter, or adjust the size according to your preferred jewelry box dimensions. Maintaining consistent stitch tension helps produce a symmetrical base.
Once the desired base size is achieved, stop increasing and crochet one round in the back loops only. This creates a clean edge where the sides of the jewelry box begin to rise naturally.
Crocheting the Jewelry Box Body
After forming the base, continue crocheting one single crochet in every stitch around without making increases. This creates the vertical walls of the jewelry box.
Repeat this round until the container reaches approximately 3 to 4 inches in height. If you would like a deeper storage compartment, simply continue adding additional rounds while maintaining the same stitch count.
To strengthen the structure of the box, crochet tightly with even tension throughout the project. Cotton yarn naturally helps the box maintain its shape, especially when combined with firm stitches.
For a decorative touch, consider changing yarn colors halfway up the container. Soft beige, brown, cream, pink, or pastel combinations create a charming teddy bear theme while making the jewelry box even more attractive.
Once the body reaches the desired height, finish the final round with a slip stitch and fasten off securely. Weave in all loose yarn ends neatly using a yarn needle to ensure a clean finish.
If desired, insert a removable cardboard or plastic circle covered with matching fabric into the bottom of the box for additional stability. Although optional, this reinforcement helps the jewelry box keep its shape over years of use.
Creating the Teddy Bear Lid
The lid begins with another magic ring using the same method as the base. Crochet increases until the circle matches the diameter of the completed jewelry box.
After reaching the correct size, crochet several rounds without increasing to create a shallow lid that comfortably fits over the container without becoming too loose.
The teddy bear ears are crocheted separately. For each ear, create a Magic Ring with 6 sc, increase to 12 stitches, crochet one additional round evenly, fold the circle in half, and stitch it securely onto the top portion of the lid.
The teddy bear muzzle starts with a small oval. Chain 6. Work around both sides of the chain using single crochet, increasing gently at each end to create a rounded oval. Lightly stuff the muzzle before sewing it to the center of the face.
Embroider the nose using black embroidery floss. A small triangular nose combined with a simple vertical stitch creates the classic teddy bear expression. Add embroidered eyes for children’s versions or safety eyes for decorative pieces intended for adults.
Finish the face by adding rosy cheeks with pink yarn or fabric-safe blush. Small eyebrows, a smiling mouth, or even a tiny crocheted bow can personalize your Crochet teddy bear jewelry box pattern and make every project unique.
Assembly and Finishing Touches
Place the completed lid onto the jewelry box to check the fit before permanently finishing any decorative elements. The lid should slide smoothly over the container while remaining secure.
If you prefer a hinged design, sew one small section of the lid to the back of the box using matching yarn. This creates a convenient opening while keeping both pieces connected.
Carefully inspect every seam to ensure all pieces are securely attached. Reinforce the ears, muzzle, and decorative accessories with extra stitches if necessary.
Steam blocking is generally unnecessary for cotton yarn, but gentle shaping with your hands while slightly damp can help smooth the overall appearance of the finished jewelry box.
Personalize your Crochet teddy bear jewelry box pattern by adding crocheted flowers, miniature hearts, ribbons, lace trim, pearls, or decorative buttons. These embellishments transform the project into a truly one-of-a-kind keepsake.
Your finished teddy bear jewelry box is now ready to store rings, earrings, bracelets, necklaces, hair accessories, sewing notions, or small sentimental items. Besides being practical, it serves as a beautiful handmade decoration for bedrooms, craft rooms, or dressing tables.
FAQ
Is the Crochet Teddy Bear Jewelry Box Pattern suitable for beginners?
Yes. Confident beginners who already know basic stitches such as chain, single crochet, slip stitch, and increases can complete this project successfully by following the instructions carefully.
Which yarn works best?
Cotton yarn is highly recommended because it creates excellent stitch definition and provides enough structure for the jewelry box to stand upright without collapsing.
What crochet stitches are used?
The primary stitches include Magic Ring, chain (ch), single crochet (sc), increase (inc), decrease (dec), slip stitch (sl st), and working in back loops for shaping.
Can I make the jewelry box larger?
Absolutely. Simply continue increasing the circular base for additional rounds before crocheting the sides. The lid should be increased proportionally to match the new diameter.
Is stuffing required?
Only the teddy bear facial features, such as the muzzle, require light stuffing. The jewelry compartment itself remains hollow for storage.
Can I sell finished jewelry boxes?
Yes. Many crocheters create handmade teddy bear jewelry boxes for local craft markets, gift shops, or custom orders, provided they respect the licensing terms of any pattern they follow.
How long does this project usually take?
Depending on your crochet experience and the amount of decoration added, the project typically takes between six and ten hours to complete.
What items fit inside the jewelry box?
The finished box is perfect for storing rings, earrings, necklaces, bracelets, watches, hair accessories, sewing clips, stitch markers, or other small keepsakes.
Conclusion
The Crochet teddy bear jewelry box pattern is a wonderful project that combines creativity, organization, and the timeless charm of handmade crochet. Throughout this tutorial, you learned how to prepare the materials, crochet the circular base, build the container walls, create the adorable teddy bear lid, assemble every component, and personalize the finished project with beautiful decorative details. Using simple stitches like the Magic Ring, chain, single crochet, increases, and decreases, you can transform ordinary yarn into a practical keepsake that is both functional and decorative.
One of the greatest advantages of this project is its flexibility. By changing yarn colors, facial expressions, embellishments, or overall dimensions, every Crochet teddy bear jewelry box pattern becomes a unique creation that reflects your own personal style. It also makes a thoughtful handmade gift for birthdays, baby showers, holidays, or special occasions while offering a lovely place to safely store treasured jewelry and keepsakes.
We hope this complete guide has inspired you to start your own Crochet teddy bear jewelry box pattern and enjoy every step of the creative process. If you found this tutorial helpful, we would truly appreciate your honest opinion. Please leave your sincere feedback, share your experience, and let us know your suggestions for future crochet tutorials. Your ideas and encouragement help inspire even more creative handmade projects for the crochet community.