
Crocheted slipper pattern projects are among the most rewarding crochet creations because they combine comfort, practicality, and creativity in one beautiful handmade item.
Crocheting your own slippers also gives you complete freedom over the design. You can choose your favorite yarn colors, add decorative textures, include buttons or flowers, or keep the style simple and elegant.
One of the greatest advantages of using a crocheted slipper pattern is its versatility. By making only a few adjustments in stitch count, hook size, or yarn thickness, you can create slippers for children, adults, or even oversized cozy house shoes. This flexibility makes the project ideal for learning important crochet techniques while creating something you will use every day.
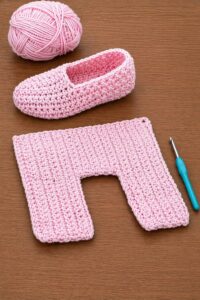
Choosing Materials and Preparing Your Crocheted Slipper Pattern
Before starting your crocheted slipper pattern, select a soft but durable yarn. Worsted weight or bulky weight yarn is commonly used because it creates thick, comfortable slippers that provide excellent insulation. Acrylic, wool blends, or cotton blends all work well depending on your climate and personal preference.
Choosing the correct crochet hook is equally important. Most slipper patterns recommend a hook between 4.5 mm and 6 mm, depending on the yarn thickness. Always crochet a small gauge swatch first to ensure the finished slippers will fit correctly and maintain their intended shape.
Additional materials include scissors, a yarn needle for weaving in ends, stitch markers, and measuring tape. If you want extra durability, you may also purchase non-slip sole fabric or silicone grip material to add traction after completing the slippers.
Take accurate foot measurements before beginning. Measure the total foot length, width across the widest part, and heel circumference. These measurements help you adjust the stitch count so the slippers fit comfortably without becoming too loose or too tight.
Choosing colors is one of the most enjoyable parts of the project. Neutral shades create timeless slippers suitable for everyday use, while bright colors and striped designs add personality. Combining two or more colors can also highlight stitch textures beautifully.
Carefully read the entire crocheted slipper pattern before making the first stitch. Understanding the construction process helps avoid mistakes and allows you to prepare every material before beginning the project.
Step-by-Step Crochet Instructions for the Sole
Begin your crocheted slipper pattern by making a foundation chain that matches the desired foot length. For an average adult size, chain approximately 21 to 25 stitches, adjusting as necessary according to your gauge and measurements.
Round 1: Work one single crochet into the second chain from the hook. Continue placing one single crochet into each chain until reaching the final chain. Place three single crochet stitches into the last chain to turn smoothly around the toe.
Continue working along the opposite side of the foundation chain. Crochet one single crochet into each remaining chain until reaching the beginning. Place two additional single crochet stitches into the first chain to complete the oval sole and join with a slip stitch.
Round 2: Chain one. Work one single crochet into every stitch around the sole. Increase by placing two single crochet stitches into each of the three turning stitches at the toe and heel. Join with a slip stitch.
Round 3: Continue crocheting one single crochet into every stitch while spacing increases evenly around the rounded toe and heel sections. The sole should remain flat without curling or rippling. Adjust increases only if necessary.
Repeat additional rounds if a larger slipper size is needed. Once the sole reaches the correct dimensions, fasten off only if your pattern requires separate construction. Otherwise, continue directly into the upper portion without cutting the yarn.
Building the Upper Section of the Slipper
To begin shaping the upper portion of the crocheted slipper pattern, crochet one round of single crochet through the back loop only. This technique creates a clean edge that separates the sole from the slipper body while helping the sides stand upright.
Round 1 of the upper section consists of one single crochet in every stitch around without increasing. This establishes the slipper walls and creates the foundation for the foot opening. Maintain even tension throughout the round.
Continue crocheting additional rounds using half double crochet or single crochet stitches depending on your preferred texture. The height of these rounds determines how much of the foot will be covered. Try the slipper on periodically for the best fit.
To shape the toe, begin decreasing across the front center. Crochet two stitches together repeatedly over the toe area while continuing regular stitches around the remaining sides. These decreases gradually form the curved front of the slipper.
Repeat toe decreases over several rounds until the opening comfortably fits around the front of the foot. Avoid decreasing too quickly, as gradual shaping creates a smoother and more comfortable finish.
Once satisfied with the fit, finish the opening using one decorative round of slip stitches or crab stitch. This reinforces the edge while providing a neat, professional appearance that complements the entire crocheted slipper pattern.
Finishing Touches, Personalization, and Care Tips
After completing both slippers, weave in every loose yarn end carefully using a yarn needle. Proper finishing prevents unraveling and greatly improves the durability of your handmade footwear over time.
If desired, sew non-slip fabric or apply silicone grip dots to the bottom of each slipper. This simple addition improves safety when walking on smooth floors while extending the life of the crochet stitches underneath.
Decorating your crocheted slipper pattern is completely optional but adds personality. Crochet flowers, bows, pom-poms, decorative buttons, simple embroidery, or textured stitch patterns can all transform basic slippers into beautiful handmade gifts.
To make matching slippers, count stitches carefully and compare measurements throughout the project. Completing both slippers at the same time by alternating rounds can also help maintain identical sizing and tension.
Hand washing is generally recommended for crochet slippers. Wash gently using cool water and mild detergent, reshape while damp, and allow them to air dry on a flat surface. Proper care preserves both the yarn fibers and the slipper shape.
As your confidence grows, experiment with different stitch combinations, textured patterns, thicker soles, colorwork, or ankle-height designs. Every new crocheted slipper pattern teaches valuable crochet skills while producing practical handmade footwear that can be enjoyed for years.
FAQ
Is a crocheted slipper pattern suitable for beginners?
Yes. Many slipper patterns use basic stitches such as chain, single crochet, half double crochet, and slip stitch, making them an excellent project for beginners who already know the crochet fundamentals.
What yarn is best for crochet slippers?
Worsted-weight acrylic, wool blends, or cotton blends are excellent choices because they provide durability, warmth, and comfort while maintaining the slipper’s shape.
How do I make slippers fit correctly?
Measure the foot carefully before beginning, crochet a gauge swatch, and try the slipper on throughout the project to make small adjustments as needed.
Can I make slippers in different sizes?
Absolutely. By adjusting the foundation chain, stitch count, and number of rounds, the same crocheted slipper pattern can be adapted for children and adults.
Which crochet stitches are commonly used?
Single crochet, half double crochet, slip stitch, and simple decreases are the most common stitches used in slipper construction.
How can I make crochet slippers less slippery?
Add non-slip fabric, silicone grip dots, or suede soles after completing the slippers to improve traction on smooth indoor floors.
Can crochet slippers be washed?
Yes. Hand washing with mild detergent and allowing them to air dry flat helps preserve both the yarn and the overall shape.
Are handmade crochet slippers good gifts?
Yes. Because they are comfortable, customizable, and handmade with care, crochet slippers are thoughtful gifts for birthdays, holidays, housewarming celebrations, and many other special occasions.
Conclusion
Creating a crocheted slipper pattern is a wonderful way to combine creativity with everyday comfort. In this guide, you learned how to choose the right yarn and hook, prepare your materials, crochet the sole step by step, build the upper section with proper shaping, finish the edges professionally, and personalize your slippers with decorative details.
By practicing these techniques, you can confidently create comfortable handmade slippers that fit beautifully and provide warmth throughout the year.
Whether you are crocheting your very first pair or adding another design to your handmade collection, every project is an opportunity to improve your crochet skills and create something truly useful. I hope this tutorial has inspired you to start your own crocheted slipper pattern today. If you enjoyed this article, please leave your honest opinion and share your suggestions in the comments. Your feedback helps inspire new crochet tutorials and supports the handmade crafting community.