
Fabric bag pattern with handles is a timeless sewing project that combines practicality, creativity, and style in a single handmade accessory.
One of the greatest advantages of making your own fabric bag pattern with handles is the freedom to create something that truly reflects your taste.
In this complete guide, you will learn how to sew a beautiful fabric bag pattern with handles inspired by a classic structured tote design. The tutorial explains every stage of the project, from choosing materials and cutting the fabric to assembling the body, attaching sturdy handles, finishing the lining, and adding optional decorative touches. Even if this is your first sewing project, following each step carefully will help you create a professional-looking bag that is both durable and attractive.
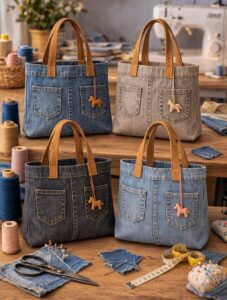
Choosing Materials for a Fabric Bag Pattern with Handles
Selecting the right fabric is the foundation of a successful fabric bag pattern with handles. Medium-weight cotton canvas, quilting cotton combined with interfacing, linen blends, or lightweight denim all work beautifully. These materials provide enough structure while remaining easy to sew on a standard sewing machine.
For a finished bag measuring approximately 15 inches wide, 14 inches high, and 4 inches deep, cut two exterior fabric panels measuring 17 x 16 inches. Cut two lining pieces using the same dimensions. The additional measurements allow for seam allowances and the boxed corners that create depth.
To strengthen the bag, cut two matching pieces of fusible interfacing measuring 17 x 16 inches. Apply the interfacing to the wrong side of the exterior fabric following the manufacturer’s instructions. This helps the bag maintain its shape even after repeated use.
Prepare two fabric strips measuring 4 x 24 inches for the handles. Fold each strip lengthwise with the wrong sides together, press, unfold, fold both long edges toward the center crease, then fold again and topstitch along both long sides. This creates durable handles that are comfortable to carry.
Gather essential sewing supplies before starting. You will need matching thread, sharp fabric scissors or a rotary cutter, sewing clips or pins, a quilting ruler, measuring tape, an iron, and a sewing machine with a universal needle suitable for woven fabrics.
Before cutting, wash and press all fabrics. Prewashing prevents future shrinkage and removes any sizing chemicals from the fabric, ensuring your finished fabric bag pattern with handles remains attractive after laundering.
Cutting and Sewing the Fabric Bag Pattern with Handles
Accurate cutting is one of the most important steps in creating a professional-looking fabric bag pattern with handles. Measure each fabric piece carefully before cutting to ensure the front, back, lining, and handles match perfectly.
Begin by placing the two exterior fabric panels with right sides together. Sew both side seams and the bottom seam using a ½-inch seam allowance. Reinforce the beginning and end of each seam with reverse stitching for additional durability.
Create boxed corners to give the bag depth. At each bottom corner, flatten the fabric so the side seam aligns with the bottom seam. Measure approximately 2 inches from the tip and draw a straight line across. Stitch along the line and trim away the excess fabric, leaving a ½-inch seam allowance.
Repeat exactly the same process with the lining pieces. However, leave an opening approximately 4 inches wide in the center of the lining’s bottom seam. This opening will later allow the bag to be turned right side out.
Position the prepared handles evenly along the top edge of the exterior bag. A spacing of approximately 4 inches from each side seam creates a balanced appearance. Baste the handles in place within the seam allowance to keep them secure during assembly.
Place the lining inside the exterior bag with right sides facing each other. Carefully align the side seams and top edges before sewing all the way around the upper opening using a consistent ½-inch seam allowance.
Assembling and Finishing the Fabric Bag Pattern with Handles
After sewing around the top edge, carefully pull the entire bag through the opening left in the lining. This turning method conceals all raw seams inside the finished bag for a clean professional appearance.
Once the bag is right side out, gently push out the corners using a blunt turning tool or chopstick. Avoid sharp objects that could accidentally puncture the fabric.
Close the opening in the lining by folding the seam allowances inward and stitching close to the folded edge. You may sew this opening by machine or use a nearly invisible ladder stitch by hand.
Press the entire bag thoroughly with an iron. Crisp pressing at every stage significantly improves the finished appearance and gives the bag a polished, store-quality look.
Topstitch approximately ⅛ inch from the upper edge of the bag. This decorative stitching strengthens the opening, helps keep the lining in place, and adds an elegant finishing detail.
Inspect every seam carefully before considering the project complete. Trim loose threads, reinforce any areas that receive additional stress, especially where the handles attach, and give the bag one final press for a flawless presentation.
Personalizing Your Fabric Bag Pattern with Handles
One of the most enjoyable parts of making a fabric bag pattern with handles is adding your own creative touches. Colorful prints, floral fabrics, geometric patterns, and seasonal designs can completely transform the final appearance of the bag.
Consider adding an exterior pocket before assembling the main bag pieces. A simple patch pocket measuring approximately 7 x 8 inches provides convenient storage for phones, keys, or small accessories.
Interior pockets are equally practical. Divide one large pocket into smaller sections by sewing vertical lines after attaching it to the lining. This helps organize pens, wallets, notebooks, and other essentials.
Decorative quilting can also elevate the project. Straight-line quilting, diamond quilting, or simple free-motion stitching adds texture while increasing the bag’s overall durability.
If you want extra security, install a magnetic snap or sew a zipper closure into the lining before final assembly. Both options help protect the contents while maintaining the bag’s stylish appearance.
Finally, personalize your bag with handmade labels, decorative buttons, embroidery, fabric appliqués, or contrasting topstitching. Small finishing details give every fabric bag pattern with handles a unique handmade character that reflects your creativity.
FAQ
Is this fabric bag pattern with handles suitable for beginners?
Yes. This project mainly uses straight seams and simple construction techniques, making it an excellent choice for beginners who want to practice essential sewing skills.
Which fabric works best?
Canvas, quilting cotton with interfacing, lightweight denim, linen blends, and home décor fabrics are excellent choices because they provide durability and attractive structure.
Do I need interfacing?
Interfacing is highly recommended because it helps the bag hold its shape, improves durability, and gives the finished project a more professional appearance.
Can I adjust the size?
Absolutely. You can increase or decrease the measurements proportionally to create a larger shopping tote, a medium everyday bag, or a smaller handbag.
How long should the handles be?
Handles measuring approximately 24 inches long and 4 inches wide before folding are comfortable for shoulder carrying. You can shorten or lengthen them to suit your preference.
Can I wash the finished bag?
Yes. Most cotton and canvas bags can be machine washed on a gentle cycle. Always prewash fabrics before sewing to minimize shrinkage afterward.
Can I add a zipper?
Certainly. A zipper can be installed along the top opening before attaching the lining, creating a more secure closure for everyday use.
Is this project good for selling?
Yes. Handmade fabric bags remain popular at craft fairs, online handmade marketplaces, and gift shops. Choosing quality materials, precise stitching, and professional finishing will increase the value of your handmade products.
Conclusion
Creating a fabric bag pattern with handles is a satisfying sewing project that combines functionality with creativity. Throughout this tutorial, you learned how to choose appropriate materials, prepare and cut fabric accurately, reinforce the exterior with interfacing, sew the main body, box the corners for added depth, construct durable fabric handles, assemble the lining, and finish the bag with neat topstitching and careful pressing. These techniques result in a sturdy, attractive bag suitable for everyday use, shopping, travel, or thoughtful handmade gifts.
As your sewing confidence grows, you can continue personalizing this project by experimenting with different fabrics, pockets, quilting designs, closures, and decorative embellishments. Every new version becomes an opportunity to improve your sewing skills while creating something practical and uniquely your own.
I hope this complete Fabric Bag Pattern with Handles guide has inspired you to start your next sewing project with confidence. If you enjoyed this tutorial, please leave your honest opinion in the comments and share your suggestions for future sewing patterns and fabric bag projects. Your feedback helps improve future tutorials and inspires even more creative ideas for the sewing community.