
Fabric shoulder bag pattern is a practical sewing project for anyone who wants to create a comfortable handmade bag with enough structure for everyday use.
Making your own bag also gives you control over dimensions, strap length, internal organization, and overall firmness.
Throughout this tutorial, you will learn how to measure and cut every major component, reinforce the exterior fabric, construct a useful interior pocket, form the main bag body, create depth at the bottom corners, sew comfortable shoulder straps, insert the lining, and complete the top edge. The instructions are designed to explain not only what to sew but why each construction step matters. This makes the Fabric shoulder bag pattern useful for improving general bag-making skills while creating an accessory that can be customized in many different ways. Accurate cutting and patient pressing will make a noticeable difference, so prepare your workspace before beginning and take your time with each stage.
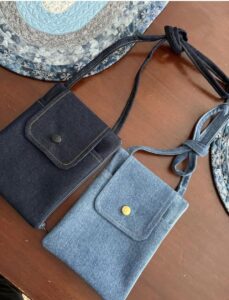
Materials, Measurements, and Fabric Preparation
For this Fabric shoulder bag pattern, begin with approximately 1 yard (0.9 m) of exterior fabric and 1 yard (0.9 m) of lining fabric. You will also need approximately 1 yard of medium-weight fusible interfacing or fleece, depending on how structured you want the finished bag to feel. Other useful supplies include coordinating polyester thread, fabric scissors or a rotary cutter, ruler, cutting mat, pins or sewing clips, iron, ironing board, sewing machine, and a suitable machine needle.
Cut two exterior rectangles measuring 15 inches wide by 14 inches high (38 x 35.5 cm). These measurements include room for seams and for creating boxed corners at the bottom. Cut two lining rectangles in exactly the same dimensions. Next, cut two interfacing rectangles slightly smaller than the exterior pieces, approximately 14 1/2 x 13 1/2 inches (37 x 34 cm), which helps keep unnecessary bulk away from the seam allowances.
For the shoulder straps, cut two fabric strips measuring approximately 4 inches wide by 30 inches long (10 x 76 cm). This creates comfortable medium-length handles suitable for carrying the finished bag over the shoulder. If you prefer a longer drop, increase each strip to 34–38 inches. For a shorter handbag-style strap, reduce the length. You may also cut two strips of lightweight interfacing approximately 1 1/2 inches wide by the same length to reinforce the handles.
An interior pocket adds functionality without making construction significantly more difficult. Cut one rectangle approximately 10 x 8 inches (25.5 x 20 cm) from the lining or a coordinating fabric. For a divided pocket, you can make this piece wider and later stitch a vertical line through the center. A second pocket can also be added to the opposite lining panel if you want separate spaces for smaller belongings.
Before sewing, prewash fabrics that may shrink, particularly cotton and linen. Dry them according to their normal care requirements and press them thoroughly. Prewashing is especially useful for a bag that may eventually need cleaning. Accurate pressing also straightens the fabric grain, helping you cut symmetrical pieces for the handmade fabric shoulder bag.
Apply the interfacing to the wrong side of both exterior panels according to the manufacturer’s appropriate heat requirements. Press rather than sliding the iron aggressively across the surface, as excessive movement can distort the fabric. Allow each panel to cool flat before handling it. This reinforced layer provides the body and stability that helps the finished Fabric shoulder bag pattern maintain its intended shape.
Sewing the Exterior Bag and Creating the Bottom Shape
Place the two reinforced exterior panels with their right sides facing each other. Carefully align all edges and secure the sides and bottom with sewing clips or pins. Leave the top edge completely open. Sew down one side, across the bottom, and up the opposite side using a 1/2-inch (1.3 cm) seam allowance. Backstitch at the beginning and end to strengthen these important seams.
After sewing, press the side seams open whenever the fabric allows. If your material is particularly thick, press the seam allowances toward one side instead. Finish the raw edges with a zigzag stitch or overlock stitch if the fabric frays easily. Although these seams will eventually be hidden by the lining, finishing them can improve durability and prevent loose fibers from accumulating inside the completed bag.
To create depth, form boxed corners at the bottom. With the exterior still wrong side out, pull one bottom corner apart so that the side seam lines up directly with the bottom seam. Flatten the resulting triangle carefully. Measure approximately 1 1/2 inches (3.8 cm) from the pointed corner along the seam and draw a perpendicular line across the triangle.
Sew directly across this marked line and backstitch securely. Measure the second corner carefully and repeat the same process. Both corners should be identical because even a small difference can cause the finished bag to lean. Trim the excess triangle approximately 1/2 inch beyond the new stitching line, leaving enough seam allowance for security.
Turn the exterior right side out and gently push out both corners. You should now see a defined bottom approximately 3 inches (7.5 cm) deep. Place the bag upright on a flat surface to check the shape. If one side appears uneven, inspect the boxed corners and side seams before proceeding. Correcting construction issues at this stage is easier than after the lining has been attached.
The exterior portion of your Fabric shoulder bag pattern is now taking shape. Press around the side and bottom edges to establish clean lines without crushing the interfacing. If you are using decorative topstitching, embroidery, labels, or fabric appliqués, many of these details are easier to add before attaching the lining. Keep embellishments away from the top seam allowance unless they are specifically intended to become part of the finished edge.
Making the Shoulder Straps, Pocket, and Lining
To construct each shoulder strap, fold a 4 x 30-inch fabric strip in half lengthwise with the wrong sides together and press firmly. Open the strip again. Fold both long raw edges inward until they meet the center crease, then press. Fold the entire strip along the original center line once more. You will now have a strap approximately 1 inch (2.5 cm) wide with the raw edges completely enclosed.
If you are adding interfacing, position the narrow interfacing strip inside before making the final fold. Topstitch approximately 1/8 inch (3 mm) from each long edge. This creates a crisp, durable strap. Repeat the process for the second handle and compare both finished pieces to ensure they have the same length.
Position the handles on the exterior bag approximately 3 1/2 to 4 inches (9–10 cm) from each side seam. Make sure neither strap is twisted. The raw ends should extend slightly beyond the top raw edge of the bag. Machine baste each strap in position approximately 1/4 inch from the edge. Tug gently on the handles afterward to confirm that they are securely held.
Next, prepare the interior pocket. Fold the 10 x 8-inch pocket rectangle in half with right sides facing, creating a 10 x 4-inch rectangle. Sew around the open edges using approximately a 1/4-inch seam allowance while leaving a 2-inch opening. Clip the corners carefully, turn the pocket right side out, push out the corners, and press. Topstitch along the folded upper edge for a clean finish.
Center the pocket on the right side of one lining panel, positioning it approximately 3 inches (7.5 cm) below the top edge. Pin securely and sew around both sides and the bottom, leaving the top open. Backstitch at the upper corners because these areas receive the greatest amount of stress. For a divided organizer pocket, sew one or two straight vertical lines from the bottom to the top.
Place the two lining panels right sides together and sew the sides and bottom with the same 1/2-inch seam allowance, but leave a 4–5 inch (10–13 cm) opening along the bottom seam. Create boxed corners exactly as you did on the exterior. Maintaining identical corner measurements ensures that the lining fits neatly inside the finished fabric shoulder bag without excessive fabric gathering at the bottom.
Final Assembly, Finishing Details, and Customization
Keep the exterior bag right side out and turn the lining wrong side out. Insert the exterior inside the lining so that the right sides of both fabrics face each other. The shoulder straps should be sandwiched safely between these layers. Align the side seams and top raw edges carefully, then secure the entire opening with sewing clips or pins.
Sew completely around the top edge using a 1/2-inch seam allowance. Take extra care when sewing across the strap positions because these areas contain additional fabric layers. For stronger handles, stitch across each strap location a second time. Avoid sewing too quickly over bulky intersections, as slower stitching gives you greater control and helps maintain an even seam.
Reach through the opening left in the lining bottom and carefully pull the exterior bag through. Continue until the entire bag has been turned right side out. Push the exterior corners into shape and smooth the lining. Fold the raw edges of the lining opening inward by approximately 1/2 inch, press, and close the opening with a narrow machine stitch or invisible hand stitching.
Push the lining completely inside the bag and press the upper edge carefully. Topstitch approximately 1/8 inch (3 mm) around the entire opening. This final row of stitching helps prevent the lining from rolling outward and gives the Fabric shoulder bag pattern a professional-looking finish. You can add a second parallel row of topstitching for additional decoration and reinforcement.
Once you understand the basic construction, customization possibilities are extensive. You can add an exterior patch pocket, magnetic snap, zipper closure, key holder, decorative buttons, contrasting bottom panel, adjustable strap, or additional interior compartments. Patchwork panels and coordinated fabric scraps can also be used to create a unique DIY fabric shoulder bag while making efficient use of leftover materials.
Before using your finished bag, inspect every seam, particularly the handle attachment areas. Trim loose threads and press the bag one final time. Fill it lightly to check how the bottom and straps behave under weight. A carefully constructed Fabric shoulder bag pattern should produce a practical accessory with balanced handles, a smooth lining, strong seams, and enough structure to maintain an attractive shape during everyday use.
Frequently Asked Questions About the Fabric Shoulder Bag Pattern
Is this Fabric shoulder bag pattern suitable for beginners?
Yes. This project uses mostly straight seams and rectangular pieces, making it approachable for beginners who understand basic sewing machine operation. The boxed corners and lined construction introduce useful bag-making techniques without requiring extremely advanced sewing skills.
What is the best fabric for making a shoulder bag?
Medium-weight fabrics generally provide the best balance between durability and ease of sewing. Cotton canvas, denim, twill, linen blends, and heavier quilting cotton are practical choices. Lightweight cotton can also work when reinforced with appropriate interfacing.
How much fabric do I need for one shoulder bag?
For the dimensions in this tutorial, approximately 1 yard of exterior fabric and 1 yard of lining fabric provide comfortable working amounts. You may use less depending on fabric width and cutting layout. Additional material may be necessary if you enlarge the bag or add multiple pockets.
Why should I use interfacing?
Interfacing adds stability and helps prevent the bag from collapsing excessively. It can also reinforce lightweight fabrics and make the finished project feel more substantial. Medium-weight fusible interfacing produces moderate structure, while fusible fleece creates a softer, slightly padded appearance.
Can I make this fabric shoulder bag without interfacing?
Yes, particularly if you are working with heavy canvas or denim. However, a bag made from lightweight fabric without reinforcement may be very soft. If that relaxed appearance is intentional, interfacing is optional.
How can I make the shoulder straps longer?
Simply increase the original 30-inch strap measurement. For a longer shoulder drop, try 34–38 inches. If you want a crossbody-style bag, considerably longer straps will be necessary, and an adjustable strap system may be more practical.
How do I make the bottom of the bag wider?
Increase the size of the boxed corners. In this pattern, stitching approximately 1 1/2 inches from each corner point creates around 3 inches of depth. Moving the stitching line farther from the corner produces a wider base, although it also slightly reduces the bag’s finished height and width.
Can I add a zipper to this Fabric shoulder bag pattern?
Yes. A zipper panel can be incorporated at the top, although this changes the assembly method slightly. Beginners may find a magnetic snap or button-and-loop closure easier for their first version.
How can I prevent the handles from pulling away from the bag?
Reinforce the handle attachment points with multiple rows of stitching. Using durable thread, strong exterior fabric, and interfaced handles also improves strength. Always check that the handles are positioned symmetrically before completing the lining.
Can I add more than one interior pocket?
Absolutely. Additional patch pockets can be attached to either lining panel before the lining pieces are sewn together. You can also divide a large pocket into smaller compartments with vertical stitching.
Can I use fabric scraps for this project?
Yes. Scraps can be pieced together to create patchwork exterior panels, pockets, or handles. If creating patchwork panels, make them slightly larger than the required dimensions first, press and reinforce them, and then trim them accurately to size.
How can I make the finished bag look more professional?
Accurate cutting, consistent seam allowances, careful pressing, reinforced handles, matching boxed corners, and clean topstitching make a significant difference. Avoid rushing the pressing stages because crisp seams and edges contribute greatly to the appearance of a handmade bag.
Can the dimensions of the bag be changed?
Yes. The Fabric shoulder bag pattern is highly adaptable. Increase or decrease the exterior and lining rectangles while keeping corresponding pieces identical. Remember that larger bags may require heavier interfacing and stronger handles to support additional weight.
How should I wash a handmade fabric shoulder bag?
Care depends on the fabrics, interfacing, and hardware used. When all components are washable, gentle hand washing is usually a cautious option. Reshape the bag while damp and allow it to air dry. Prewashing the main fabrics before construction can reduce unexpected shrinkage later.
Conclusion
The Fabric shoulder bag pattern provides a practical way to transform basic fabric rectangles into a structured, lined, and reusable handmade accessory. Throughout this tutorial, you learned how to select appropriate materials, calculate and cut the exterior and lining pieces, apply interfacing, prepare an interior pocket, and construct the main body of the bag using consistent seam allowances.
You also learned how to create boxed corners for additional depth, make reinforced shoulder straps, position the handles evenly, assemble the lining, turn the project through a hidden opening, and finish the upper edge with clean topstitching. These techniques are valuable beyond this individual project because they can also be adapted to totes, organizers, handbags, and many other handmade accessories.The greatest advantage of making your own fabric shoulder bag is the freedom to personalize the finished project. Try different fabric combinations, adjust the dimensions, experiment with longer straps, add pockets, or incorporate a favorite patchwork design. Once you understand the basic construction method, you can use the same foundation to create many different styles.
If you make this Fabric shoulder bag pattern, please leave your sincere opinion about the project and share any suggestions or creative modifications you would recommend. Your experience with different fabrics, dimensions, pockets, straps, and finishing techniques can provide valuable inspiration for future handmade sewing projects.