
Round fabric coaster pattern is a practical and creative sewing project that transforms small pieces of fabric into attractive accessories for protecting tables, desks, and countertops.
One of the most enjoyable aspects of a round fabric coaster is how easily the design can be customized. Floral cotton creates a cheerful spring or summer look, gingham works beautifully with rustic décor, and neutral linen-look fabrics can produce a sophisticated result.
The construction method used in this Round fabric coaster pattern is beginner-friendly while still teaching several valuable sewing techniques. You will learn how to prepare a circular template, cut fabric accurately, add a protective middle layer, sew around curves, clip the seam allowance, turn the project right side out, close the opening, and finish the coaster with neat topstitching. For a useful everyday size, this tutorial works with a circle approximately 5 inches (12.7 cm) in diameter before sewing, producing a slightly smaller finished coaster after the seam allowance is taken into account. You can easily modify that measurement to create smaller coasters for cups or larger versions for mugs and small serving dishes. Accuracy matters more than the exact diameter, so focus on keeping all layers aligned and maintaining an even seam allowance throughout the project.
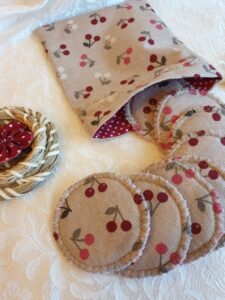
Materials, Measurements, and Fabric Preparation
To begin the Round fabric coaster pattern, gather cotton fabric for the front and back of each coaster. Quilting cotton is an especially convenient choice because it is easy to cut, press, and sew, and it comes in countless colors and prints. For each coaster, prepare two fabric squares measuring approximately 5½ x 5½ inches (14 x 14 cm). These squares give you enough space to position and cut a 5-inch circular template comfortably. You will also need one piece of thin batting or interfacing of approximately the same size.
The middle layer gives the coaster structure and helps provide additional protection between a cup and the furniture beneath it. Thin cotton batting is a useful option when you want a soft, slightly quilted result. Fusible fleece can create a thicker coaster, while lightweight interfacing produces a flatter finish. Avoid making the center excessively bulky because thick layers can make it more difficult to achieve a smooth circular edge after turning.
Create a 5-inch round template using sturdy paper or lightweight cardboard. A compass can help produce an accurate circle, but you can also trace a round household object that matches the desired measurement. Place the template on the wrong side of your fabric and trace around it with a removable fabric marker. Repeat this process until you have two fabric circles and one batting circle for every coaster you plan to make.
When cutting the circles, use sharp fabric scissors or another suitable fabric-cutting tool and work slowly around the traced line. Smooth cutting is important because uneven edges can become more noticeable once the curved seam is sewn. If you are making several coasters, use the same template for every piece so that all finished circles remain consistent. This simple habit makes a handmade set appear much more coordinated.
Before assembling the layers, press the fabric gently to remove folds and wrinkles. Flat fabric is easier to align and produces more accurate results. If you are using directional fabric, consider how the print will appear on the finished circle. Although there is no obvious top or bottom on a plain round coaster, motifs such as flowers, animals, houses, or lettering may have a preferred orientation.
This preparation stage is also the perfect time to experiment with combinations for your handmade fabric coasters. You could use the same print on both sides, create a reversible design with different fabrics, or make each coaster in a coordinated but slightly different print. Scrap-friendly projects become especially interesting when fabrics share a common color palette even when their individual patterns are different.
Step-by-Step Sewing Instructions for a Round Fabric Coaster
Begin assembling your Round fabric coaster pattern by placing the batting on your work surface. Put one fabric circle on top with its right side facing upward. Position the second fabric circle over it with the right side facing downward. The two right sides of the fabric should therefore be facing each other, while the batting sits against the wrong side of one fabric circle.
Carefully align all three circular edges and secure the layers with clips or pins. Use enough clips to prevent the curved pieces from shifting while sewing. Because circles do not have corners that naturally help maintain alignment, securing the layers at several points around the circumference can make sewing significantly easier. Check that no section of the batting extends excessively beyond the fabric edges.
Sew around the circle using approximately a ¼-inch (6 mm) seam allowance. Leave an opening of roughly 2 inches (5 cm) unsewn so the coaster can be turned right side out. Sew slowly and gently rotate the fabric as you follow the curve rather than making sudden directional changes. A shorter stitch length can help create a smoother circular seam.
Backstitch at both sides of the turning opening. This reinforces the seam because those points receive additional stress when the coaster is turned. Before removing the project from the sewing machine, inspect the stitching to make sure you have caught all three layers. If a section of batting or fabric has slipped away from the seam, correct it before proceeding.
The next step is essential for achieving a smooth round fabric coaster. Carefully clip small notches into the seam allowance around the circle, spacing them approximately ½ inch apart. Do not cut through the stitching. These small clips allow the seam allowance to spread when the circle is turned, reducing puckering and helping the outer edge form a more natural curve.
Turn the coaster right side out through the opening. Work gradually rather than pulling aggressively, particularly if the opening is small. Once turned, use your fingers or a blunt turning tool to gently shape the circular edge from inside. Avoid using a sharp object that could push through the seam. Take time to smooth the entire circumference before moving to the finishing stage.
Pressing, Topstitching, and Finishing the Circular Shape
After turning the Round fabric coaster pattern right side out, the project may initially look slightly wrinkled. This is normal. Roll the seam gently between your fingers to encourage the edge outward, then arrange the coaster on the ironing surface. Pay particular attention to the opening because it needs to be folded inward so that it follows the same circular curve as the rest of the edge.
Fold the raw edges at the opening inward by approximately the same amount as your original seam allowance. Press them carefully into place. When viewed from above, the opening should blend naturally into the circumference rather than forming a flat or pointed section. A little patience at this stage contributes significantly to a cleaner finished result.
Press the entire coaster using a temperature suitable for your chosen fabric and batting. Do not stretch the circle while pressing because this can distort its shape. Instead, lift and lower the iron as needed. If your batting reacts poorly to high temperatures, follow the appropriate care requirements and use a pressing cloth when necessary.
Now topstitch around the entire perimeter approximately ⅛ inch (3 mm) from the edge. This stitching closes the turning opening while also providing a decorative finish. Sew slowly and keep the distance between the stitching and the edge as consistent as possible. Matching thread creates a subtle result, while contrasting thread can turn the topstitching into an intentional design feature.
For additional texture, sew another circular line approximately ¼ to ½ inch inside the first topstitched line. This optional quilting detail helps secure the fabric to the batting and can give the coaster a more defined shape. Another possibility is to quilt a simple spiral beginning near the outside edge and gradually working toward the center.
Once the stitching is finished, inspect your fabric coaster from both sides. Trim any visible thread tails and check that the turning opening is completely secured. Place the coaster flat on the table and make sure it does not curl significantly around the edges. Minor irregularities are part of handmade sewing, but careful pressing can often improve the final shape.
Customization Ideas and Tips for Professional-Looking Coasters
There are many ways to personalize a Round fabric coaster pattern while keeping the basic construction unchanged. One of the easiest is to create reversible coasters. Choose a patterned fabric for one side and a coordinating solid color for the other. This essentially provides two looks in one project and allows the coaster set to adapt to different table settings.
Patchwork is another attractive option. Instead of cutting the front circle from a single fabric, sew several small scraps together first. Press the seams flat and then place your round template over the patchwork panel. Cut the circle as usual. This technique is an excellent way to use narrow strips and irregular leftovers while creating a completely unique scrap fabric coaster.
You can also change the size of the project. A circle between 4½ and 5 inches works well for many standard cups and glasses, while a larger circle of approximately 6 to 7 inches can accommodate oversized mugs. When resizing, remember that the finished coaster will be slightly smaller than the original cut circle because of the seam allowance.
For a coordinated dining set, make four, six, or eight coasters using fabrics from the same collection. They do not necessarily need to be identical. For example, each coaster could feature a different floral print while sharing the same backing fabric. Repeating one color or print throughout the collection helps visually connect the individual pieces.
If your finished coaster looks uneven, examine the seam allowance first. An inconsistent allowance is one of the most common reasons circular sewing projects lose their shape. Sewing slowly, clipping curves evenly, and pressing thoroughly can dramatically improve the outcome. Practice also matters; each round sewing project becomes easier as you become more comfortable guiding curves beneath the presser foot.
Finally, consider practicality when selecting materials. Coasters are likely to encounter moisture and occasional spills, so washable fabrics are helpful. Prewashing cotton fabric before sewing can reduce unexpected shrinkage later. Choose materials appropriate for the way you expect to use and clean the finished project, especially when creating a set intended for regular household use.
Frequently Asked Questions About the Round Fabric Coaster Pattern
What is the best fabric for a Round fabric coaster pattern?
Quilting cotton is one of the easiest materials to use because it is stable, widely available, easy to press, and available in many designs. Cotton and cotton-linen blends can also work well. Very stretchy or slippery fabrics may be more difficult for beginners because maintaining an accurate circular shape becomes more challenging.
What size should a round fabric coaster be?
A finished diameter of approximately 4 to 4½ inches works well for many cups and glasses. Starting with a 5-inch circle provides room for the seam allowance. However, coaster size is flexible, and larger versions can be made for oversized mugs or other tableware.
Do fabric coasters need batting?
Batting is not absolutely required, but it provides structure and additional cushioning. Without a middle layer, two pieces of quilting cotton may produce a very thin coaster. Thin cotton batting, interfacing, or suitable fusible fleece can create a more substantial finished project.
How much fabric do I need to make a set of coasters?
The exact amount depends on the size and number of coasters. Because each coaster uses relatively small circles, this pattern is particularly suitable for fabric scraps, fat quarters, and leftovers from quilting projects. Planning your circles before cutting helps minimize fabric waste.
Why does my round coaster look wrinkled around the edges?
Wrinkling can occur when the curved seam allowance does not have enough room to spread after turning. Clipping small notches around the seam allowance helps release this tension. Uneven sewing, excessive batting thickness, or stretching the fabric while pressing can also contribute to puckering.
How do I sew a perfect circle on a sewing machine?
Use a moderate or slow sewing speed and guide the fabric gradually. Rather than making large rotations, make many small adjustments while maintaining a consistent seam allowance. Marking the stitching line before sewing can also help beginners follow the curve accurately.
Can I hand sew this Round fabric coaster pattern?
Yes. Although a sewing machine makes the project faster, the construction can be completed by hand using small, consistent stitches. Secure the seams carefully and use strong thread, especially around the outer circumference.
Can I make these coasters from leftover quilt fabric?
Absolutely. This is an excellent fabric scrap project because the pieces required are small. Leftover quilting cotton can be used individually or combined into patchwork panels before the circles are cut.
How can I make my fabric coasters look more professional?
Accurate cutting, consistent seam allowances, careful clipping, thorough pressing, and even topstitching are the most important details. Using the same template for every coaster also creates consistency across a complete set.
Should I prewash the fabric?
Prewashing is helpful when the finished coasters are likely to be washed regularly. Cotton fabrics can shrink, so washing and pressing them before cutting may help reduce dimensional changes after the project is complete.
Can I quilt the coaster after sewing it?
Yes. Once the coaster is turned and pressed, decorative quilting can secure the layers and add visual texture. Concentric circles, a spiral, straight lines, or simple geometric designs can all work well.
What can I do if the coaster does not lie flat?
Start by pressing it carefully. If the edge still curls, check whether the seam allowance was clipped sufficiently and whether the topstitching is pulling too tightly. Excessively thick batting can also affect how flat a small coaster sits.
Conclusion
The Round fabric coaster pattern is a simple but satisfying sewing project that combines practical construction techniques with plenty of opportunities for creativity. Throughout this tutorial, you learned how to prepare a circular template, choose suitable fabrics, cut consistent pieces, add batting, assemble the layers, and sew around the curved perimeter while leaving an opening for turning.
You also learned why clipping the circular seam allowance is important and how careful turning and pressing help create a smoother shape. Finishing the edge with neat topstitching closes the opening while giving the handmade round coaster a more polished appearance. Optional quilting can add even more structure and decorative texture.The basic technique can be adapted in many ways. You can experiment with reversible fabrics, patchwork scraps, seasonal prints, different coaster sizes, contrasting topstitching, and coordinated sets. Once you understand the construction process, the same Round fabric coaster pattern can become the foundation for many creative variations.
This is also a useful project for making the most of leftover fabric from previous sewing and quilting projects. Instead of discarding smaller pieces, you can combine them into practical accessories for your home or create coordinated handmade sets.If you try this Round fabric coaster pattern, please leave your sincere opinion and suggestions. Share which fabrics, colors, sizes, or finishing techniques you would choose for your own version. Creative feedback and new ideas are always welcome and can inspire even more variations of this simple and useful sewing project.