
Bat crochet pattern projects are among the most enjoyable amigurumi creations for crocheters who love cute handmade decorations, seasonal crafts, and creative gifts.
One of the best things about making a Bat crochet pattern is that it requires only a small amount of yarn, making it an excellent stash-busting project.
In this complete tutorial, you will learn exactly how to crochet the bat step by step using common crochet abbreviations, easy amigurumi shaping techniques, and detailed assembly instructions. From selecting the best materials to crocheting the head, body, wings, ears, and tiny facial features, every stage is carefully explained. By the end of this guide, you will have the confidence to customize your own Bat crochet pattern and create a handmade project you can proudly display or give as a thoughtful gift.
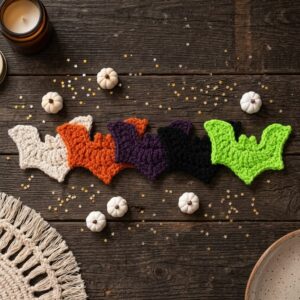
Materials and Crochet Stitch Guide
Before beginning your Bat crochet pattern, gather all of the necessary supplies. Preparing everything in advance makes the crochet process smoother and helps maintain consistent stitch quality throughout the project.
Choose cotton yarn for crisp stitch definition or soft acrylic yarn if you prefer a plush, cuddly finish. Both yarn types work beautifully for amigurumi.
Use a crochet hook that is one size smaller than normally recommended for your yarn. This creates tighter stitches that prevent the stuffing from showing through the fabric.
Additional materials include polyester fiberfill stuffing, stitch markers, scissors, a yarn needle, embroidery thread, and safety eyes if desired.
The crochet abbreviations used in this project are:
ch = chain
mr = magic ring
sc = single crochet
inc = increase (2 sc in one stitch)
dec = invisible decrease
sl st = slip stitch
FO = fasten off
Carefully count your stitches after every round. Accurate stitch counts ensure that both sides of your bat remain symmetrical and that the final shape stays balanced throughout the construction process.
Crocheting the Head and Body
Begin your Bat crochet pattern by crocheting the head using a magic ring.
Round 1: Work 6 sc into the magic ring. Tighten the ring securely. (6)
Round 2: Inc in every stitch around. (12)
Round 3: (1 sc, inc) repeat around. (18)
Round 4: (2 sc, inc) repeat around. (24)
Rounds 5–9: Sc in each stitch around. These rounds create the rounded head shape. Attach the safety eyes between Rounds 6 and 7 before stuffing.
Round 10: (2 sc, dec) repeat around. (18)
Round 11: (1 sc, dec) repeat around. (12)
Stuff the head firmly with fiberfill while maintaining a smooth round shape.
Continue directly into the body if making a one-piece bat, or crochet a separate body beginning with another magic ring using the same increase technique before gradually decreasing to create a slightly oval shape.
Finish the body by stuffing evenly and closing the final opening using invisible decreases. Secure the yarn and weave in the end neatly.
Making the Wings, Ears, and Assembly
The wings are the signature feature of any Bat crochet pattern. They can be made separately and sewn onto the finished body.
For each wing:
Ch 16.
Row 1: Starting in the second chain from the hook, work 15 sc.
Row 2: Ch 1, turn, work 15 sc.
Row 3: Create gentle curves by working small decreases at the beginning and end of the row.
Continue shaping until the wing resembles a soft triangular curve. Repeat for the second wing, ensuring both sides are identical.
To create each ear:
Round 1: 4 sc in a magic ring.
Round 2: (1 sc, inc) twice.
Flatten the piece and sew it to the top of the head with the pointed side facing upward.
Sew the wings securely to both sides of the body using matching yarn. Position them evenly so they extend naturally without twisting.
Finally, embroider a tiny smile and optional nostrils using black or pink embroidery thread. Small facial details bring your crochet bat to life and give it a friendly appearance.
Customization Tips and Finishing Touches
One of the most enjoyable aspects of a Bat crochet pattern is the opportunity to personalize every finished piece.
Experiment with different yarn colors instead of traditional black. Gray, lavender, cream, navy, or pastel shades create adorable bats suitable for year-round decorations.
Add blush to the cheeks using soft fabric-safe coloring or embroidery thread to give your bat an even sweeter facial expression.
If making the bat for a child, embroidered eyes are an excellent alternative to safety eyes, providing a softer and more child-friendly finish.
You can also crochet tiny accessories such as bows, miniature scarves, flowers, pumpkins, stars, or tiny hats to match different holidays and seasons.
Finished bats can become keychains, hanging ornaments, nursery decorations, backpack charms, gift toppers, or part of a larger amigurumi animal collection. Once you master the basic construction, experimenting with different sizes using various yarn weights becomes easy and enjoyable.
Frequently Asked Questions
Is this Bat crochet pattern suitable for beginners?
Yes. The project mainly uses beginner-friendly amigurumi stitches such as single crochet, increases, decreases, and the magic ring.
Which yarn works best?
Cotton yarn produces excellent stitch definition, while acrylic yarn creates a softer plush appearance. Both options work well.
Can I make a larger bat?
Absolutely. Simply use thicker yarn and a larger crochet hook while following the same stitch sequence.
How much yarn does the project require?
Only a small amount of yarn is needed, making this an ideal project for using leftover yarn from previous crochet projects.
Should I use safety eyes?
Safety eyes create a polished appearance, but embroidered eyes are recommended for projects intended for very young children.
Can I wash the finished bat?
Yes. Hand washing with mild detergent followed by air drying helps preserve the shape and texture of the crochet stitches.
Can I sell bats made from this pattern?
Yes. Handmade crochet bats are popular at craft fairs and online handmade marketplaces, provided your finished products comply with applicable laws and marketplace requirements.
Can I customize the wings?
Definitely. Larger wings, pointed wings, rounded wings, textured wings, or decorative embroidery all allow you to create unique versions of your Bat crochet pattern.
Conclusion
Creating a Bat crochet pattern is a rewarding project that combines simple crochet techniques with endless opportunities for creativity. Throughout this tutorial, you learned how to prepare your materials, understand the essential crochet abbreviations, crochet the head and body, shape expressive wings and ears, assemble every piece carefully, and finish your bat with charming embroidered details. These techniques not only help you complete this project successfully but also strengthen your confidence for future amigurumi creations.
As your crochet skills continue to grow, you can easily personalize your bats by experimenting with different colors, yarn textures, facial expressions, accessories, and sizes. Whether you create a tiny keychain, a decorative ornament, a nursery companion, or a thoughtful handmade gift, every finished bat becomes a unique reflection of your creativity and craftsmanship.
Thank you for reading this Bat crochet pattern guide. I hope this tutorial inspires you to pick up your crochet hook and create your own adorable bat. If you enjoyed this article, please leave your honest opinion, share your experience with the pattern, and send your suggestions for future crochet tutorials. Your feedback is always appreciated and helps inspire even more creative handmade projects.