
Simple fabric tote bag pattern is a practical sewing project for anyone who wants to turn basic fabric pieces into a useful, reusable handmade bag.
The beauty of a Simple fabric tote bag pattern is its flexibility. You can create the bag from quilting cotton, canvas, denim, twill, linen blends, or many other woven fabrics, depending on how structured you want the finished project to feel.
For this tutorial, a practical finished size is approximately 14 inches wide by 15 inches tall, although the measurements can easily be adjusted. You will generally need two exterior rectangles measuring approximately 16 x 17 inches, two lining rectangles of the same size if you choose a lined construction, and two handle strips measuring approximately 4 x 24 inches each. Seam allowances of about 1/2 inch provide comfortable working space for most home sewing machines. Before cutting, wash, dry, and press washable fabric when appropriate so that unexpected shrinkage is less likely to affect the completed bag. Accurate cutting is one of the most important steps in this easy tote bag sewing project, because matching rectangles create straighter seams and a more balanced finished shape.
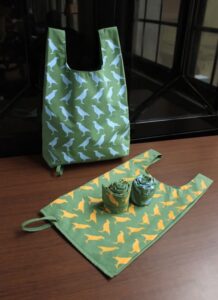
Materials, Measurements, and Preparing the Fabric
Begin your Simple fabric tote bag pattern by gathering the necessary materials. You will need approximately 1/2 to 3/4 yard of exterior fabric, depending on its width and the size of your tote. If you want a lining, prepare a similar quantity of coordinating fabric. You will also need matching sewing thread, fabric scissors or a rotary cutter, a cutting mat if using a rotary cutter, a ruler, sewing pins or clips, an iron, an ironing surface, and a sewing machine. Optional materials include lightweight or medium-weight interfacing, webbing for ready-made handles, and a magnetic snap or simple interior pocket.
Press the fabric thoroughly before measuring. Wrinkles can change the position of your ruler and result in uneven pieces. For a medium tote, cut two 16 x 17-inch rectangles from the exterior fabric. The 16-inch measurement represents the approximate width before seam allowances, while 17 inches provides the height needed for a comfortable everyday tote. If your fabric has a directional print, make sure the design points upward on both pieces. This small detail prevents flowers, animals, lettering, or other motifs from appearing upside down on one side of the finished bag.
If you are making a lined version, cut two additional 16 x 17-inch rectangles from the lining fabric. A lining is not absolutely necessary, but it gives a handmade fabric tote bag a more finished interior and provides another layer of support. Lightweight quilting cotton is particularly convenient for lining because it is easy to sew and does not add excessive bulk. If the exterior fabric is thin, you can also cut two pieces of fusible interfacing slightly smaller than the exterior rectangles and apply them according to the product instructions before beginning construction.
Next, prepare the handles. Cut two strips measuring approximately 4 x 24 inches from the exterior or coordinating fabric. For longer shoulder straps, increase the length to approximately 26 to 28 inches. Fold each strip in half lengthwise with the wrong sides together and press to establish a center crease. Open the strip, fold both long raw edges inward until they meet at the center crease, and press again. Fold the entire strip along the original center line. You should now have a handle approximately one inch wide with the raw edges completely enclosed.
Topstitch along both long edges of each handle approximately 1/8 inch from the edge. Sewing along both sides gives the straps a crisp appearance and helps prevent them from twisting or unfolding during use. Maintain an even stitch length and sew slowly enough to keep the topstitching parallel to the folded edges. If your fabric is particularly lightweight, a narrow strip of interfacing inside each handle can provide additional support. For thick canvas, however, extra interfacing may not be necessary.
Before assembling the bag, place all cut pieces on a flat surface and confirm that the exterior rectangles match each other. Check the lining pieces in the same way. Mark the center of the upper edge of each exterior panel with a removable fabric marker or a small crease. These reference points will help you position the handles evenly. Good preparation may seem like an extra step, but accurate measurements and careful pressing make the remaining stages of the Simple fabric tote bag pattern much easier.
Sewing the Tote Bag Body and Creating Strong Handles
Place the two exterior fabric rectangles right sides together, carefully matching the side and bottom edges. Pin or clip around both sides and across the bottom, leaving the top completely open. Starting at the upper corner, sew down one side using approximately a 1/2-inch seam allowance. Pivot at the bottom corner, sew across the bottom, pivot again, and sew up the opposite side. Backstitch briefly at the beginning and end of the seam to reinforce these areas.
After sewing the body, inspect the seam to ensure that no sections were accidentally missed. Press the seam allowances to one side or open, depending on the thickness of your material. If you are making an unlined tote, finish the raw edges with a zigzag stitch, overcast stitch, or serger to help reduce fraying. This is particularly useful for fabrics that shed fibers easily. Clean interior seams improve both durability and appearance, even when they will not normally be visible from the outside.
For a basic flat tote, you can keep the lower corners exactly as they are. If you want a more spacious fabric tote bag with boxed corners, pinch one bottom corner so that the side seam aligns with the bottom seam. Flatten the resulting triangle and measure approximately 1 1/2 to 2 inches from the point. Draw a straight line perpendicular to the seam and stitch across that line. Repeat on the opposite corner, taking care to use exactly the same measurement.
Trim the excess corner fabric approximately 1/2 inch beyond each new seam if desired, then finish the raw edge. When the bag is turned right side out, these boxed corners create a flat base and additional interior volume. A 1 1/2-inch measurement produces subtle depth, while a 2-inch or larger measurement creates a wider bottom. Remember that deeper corners slightly reduce the overall height and width of the finished tote, so consider the intended proportions before cutting away any fabric.
Now position the handles. With the exterior bag still accessible at the top, measure approximately 3 1/2 to 4 inches from each side seam and mark the handle positions. Place one end of a handle at each mark on the front panel, making sure the handle is not twisted. Repeat with the second handle on the back panel. The raw ends should align with the upper raw edge of the bag, while the handle loops extend downward against the exterior fabric during lined construction.
Baste each handle approximately 1/4 inch from the top edge. Basting prevents the straps from moving when the lining is added and gives you an opportunity to verify their alignment. Lift the bag carefully and compare both handles. They should be approximately equal in length and positioned symmetrically. Correcting a crooked handle at this stage is much easier than discovering the problem after the upper edge has been completely sewn and turned.
Adding the Lining and Giving the Bag a Professional Finish
To create the lining for your Simple fabric tote bag pattern, place the two lining rectangles right sides together. Sew both side seams and the bottom seam with approximately a 1/2-inch seam allowance, but leave an opening of about 4 to 5 inches along the bottom seam. This opening is important because it will later allow you to turn the entire tote right side out. Backstitch securely at both ends of the opening so that the stitches do not loosen during turning.
If you created boxed corners on the exterior bag, repeat exactly the same process on the lining. Align each side seam with the bottom seam, measure the same distance from the point, draw a line, and stitch across it. Matching the exterior and lining corner dimensions helps the two layers fit together naturally. Trim and finish the corners as necessary. Press the lining seams neatly before proceeding because pressing becomes more difficult once the layers are joined.
Keep the exterior bag right side out and turn the lining wrong side out. Slide the exterior bag inside the lining so that the right sides of the two fabrics are facing each other. The handles should be sandwiched between the exterior and lining layers. Match the side seams and upper raw edges, then pin or clip all the way around the opening. Check once again that the handles point downward between the layers and are not caught incorrectly in the side seams.
Sew around the entire upper edge using a 1/2-inch seam allowance. When you reach each handle, sew slowly across the thicker area. For additional reinforcement, you can backstitch over each handle attachment point. Once the top seam is complete, reach through the opening that you left in the lining bottom and gently pull the exterior bag through. Continue turning until both the exterior and lining are completely right side out.
Push the lining inside the exterior bag and carefully roll the upper seam between your fingers until the edge sits evenly. Press the top edge with an iron at a temperature suitable for your fabric. Then topstitch approximately 1/8 inch from the upper edge around the entire tote. This topstitching keeps the lining from rolling outward, reinforces the handles, and gives the bag a crisp, professional finish. You may add a second row of stitching approximately 1/4 inch below the first for extra decorative detail.
Finally, close the opening in the lining. Fold the raw edges inward by approximately 1/2 inch and press them so they align with the existing seam. Stitch the opening closed close to the folded edge using the sewing machine, or hand-sew it with a small ladder stitch if you prefer an almost invisible finish. Push the lining fully into place and press the completed Simple fabric tote bag one final time, paying particular attention to the top edge, handles, and lower corners.
Customization Ideas, FAQ, and Finishing Tips
One reason the Simple fabric tote bag pattern is so useful is that it can serve as a foundation for countless variations. Once you understand the basic body, handles, lining, and boxed-corner construction, you can change almost every visual element. Try combining a solid canvas exterior with a colorful printed lining, using contrasting fabric for the handles, or creating the front and back panels from coordinated patchwork pieces. These simple changes can make each tote feel completely different without requiring a new construction method.
An interior pocket is another practical addition. Before sewing the lining pieces together, cut a rectangle approximately 8 x 10 inches. Fold the upper edge toward the wrong side twice by about 1/2 inch and topstitch it. Fold the remaining raw edges inward, press, and position the pocket on the right side of one lining panel. Stitch along both sides and the bottom, leaving the top open. You can also sew one vertical line through the pocket to divide it into two smaller compartments.
For a more structured DIY tote bag, add fusible interfacing or sew-in stabilizer to the exterior panels. The amount of structure should match the intended use. A soft tote for yarn or lightweight belongings may require little or no interfacing, while a bag intended to stand upright benefits from additional support. Avoid making every layer unnecessarily heavy, especially around the upper edge, because excessive thickness can make turning and topstitching difficult on some domestic sewing machines.
Decorative details can also make a simple design more personal. Consider adding a fabric label, appliqué, embroidery, patchwork panel, contrasting topstitching, or an exterior pocket before assembling the main body. Decorative elements are usually easiest to attach while the exterior panels are still flat. Planning these additions early prevents you from having to maneuver the entire finished bag under the sewing machine later.
Before considering the project complete, examine the main stress points. Check where each handle joins the bag, inspect the side seams, and verify that the lining opening has been securely closed. Loose threads can be trimmed after checking that all seams are properly backstitched. If the tote will regularly carry heavier everyday items, reinforce the handles with an additional rectangle or X-shaped stitching pattern near each attachment point.
A handmade tote does not need to look identical to a commercially manufactured bag. Small variations in topstitching or dimensions are natural, particularly when you are learning. Focus on accurate cutting, consistent seam allowances, careful pressing, and secure construction. These fundamentals improve rapidly with practice, and the uncomplicated structure of a Simple fabric tote bag pattern makes it an excellent project for developing sewing confidence.
FAQ – Frequently Asked Questions About the Simple Fabric Tote Bag Pattern
Is a simple fabric tote bag suitable for a beginner?
Yes. A basic tote is one of the most approachable sewing projects because most of the construction involves straight seams. Beginners can practice measuring, cutting, pinning, maintaining seam allowances, pressing, turning, and topstitching while creating something practical. A lined version adds a few steps but also provides valuable experience with assembling multiple fabric layers.
What is the best fabric for making a tote bag?
Cotton canvas, medium-weight cotton, denim, twill, and sturdy linen blends are popular choices. The ideal material depends on the intended use. Canvas naturally provides more structure, while quilting cotton is easier to handle but may benefit from interfacing. For a first project, choose a stable woven fabric that does not stretch excessively while sewing.
How much fabric do I need for a simple tote bag?
For a medium-sized tote, approximately 1/2 to 3/4 yard of exterior fabric is often sufficient, depending on fabric width, handle dimensions, print direction, and the desired bag size. A lined tote will require additional lining fabric. Buying slightly more than the calculated minimum provides room for straightening edges and correcting minor cutting mistakes.
What seam allowance should I use?
This tutorial uses approximately a 1/2-inch seam allowance, which is easy to see and control. However, other measurements can work as long as you use the same seam allowance consistently throughout matching sections. Inconsistent seam allowances can cause the lining and exterior to finish at different sizes.
How can I make the tote bag stronger?
Choose durable fabric, use quality thread, reinforce the handle attachment points, and consider adding interfacing. You can also sew a second line of stitching beside important seams. The appropriate reinforcement depends on what you plan to carry, so a lightweight craft tote may require less structure than an everyday bag.
Can I make the tote without a lining?
Yes. For an unlined version, finish all interior raw edges carefully using a zigzag stitch, overcast stitch, binding, or serger. You will also need to finish the upper edge separately by folding it toward the inside before attaching or securing the handles. A lining is optional, although it provides a particularly clean interior finish.
How long should tote bag handles be?
Approximately 22 to 24 inches works well for many hand-carried or short shoulder totes. Handles measuring 26 to 28 inches provide additional room for shoulder carrying. Body size and personal preference vary, so you can test the length by holding a strip of fabric or measuring tape in the intended position before cutting your final straps.
Why does my lining bunch up inside the bag?
Bunching can happen if the lining is slightly larger than the exterior or if the boxed corners do not match. Accurate cutting and consistent seam allowances help prevent this issue. If desired, you can make the lining marginally smaller than the exterior, but only by a small amount so it still fits comfortably.
How do I make boxed corners even?
Match the side seam precisely with the bottom seam, flatten the corner, and measure from the point using the same measurement on both sides. Mark the stitching line before sewing. Repeat exactly the same process for every exterior and lining corner. Careful measuring is more reliable than estimating by eye.
Can I change the dimensions of this tote bag pattern?
Certainly. The rectangular construction makes resizing straightforward. Increase the width and height of both exterior and lining pieces by equal amounts while remembering that seam allowances reduce the final dimensions. Handles can also be lengthened or shortened according to the desired carrying style.
Should I wash fabric before sewing a tote bag?
For washable natural fabrics that may shrink, prewashing can be helpful because it reduces the chance of significant shrinkage after the finished tote is cleaned. Follow the care requirements appropriate for the specific fabric. After washing and drying, press the material before measuring and cutting.
How can I make my handmade tote look more professional?
Accurate cutting and pressing are two of the most effective improvements. Maintain consistent seam allowances, trim loose threads, align the handles carefully, press the top edge before topstitching, and sew slowly around visible areas. Neat finishing often has a greater impact on appearance than complicated decorative techniques.
Conclusion
The Simple fabric tote bag pattern is a versatile sewing project that teaches useful techniques while producing a practical handmade accessory. In this tutorial, you learned how to select suitable fabric, calculate and cut the exterior and lining panels, prepare sturdy fabric handles, sew the main body, create optional boxed corners, assemble the lining, join the layers, turn the bag, and finish the upper edge with clean topstitching.
You also learned how small construction details can improve the final result. Consistent seam allowances, careful pressing, reinforced handles, accurately matched corners, and neatly finished interior seams all contribute to a stronger and more polished tote. Optional additions such as interfacing, interior pockets, patchwork panels, appliqué, embroidery, and contrasting handles allow the basic pattern to become a highly personalized project.
Once you understand the basic construction, try adapting the measurements to create different sizes and styles. You might make a compact craft tote, a taller everyday bag, a wide boxed-bottom carryall, or a colorful patchwork version using fabric scraps. The same fundamental Simple fabric tote bag pattern can become the starting point for many creative sewing projects. If you try this tutorial, leave your sincere opinion about the pattern and share your suggestions, preferred fabrics, modifications, and creative ideas for future tote bag projects.