
Granny Square-style crochet pumpkin pattern is a charming way to combine the familiar texture of traditional granny-inspired crochet with the warm, welcoming look of an autumn pumpkin.
One of the most attractive features of a Granny Square-style crochet pumpkin pattern is the combination of geometric crochet texture and rounded shaping.
For this tutorial, the goal is to create a practical granny square crochet pumpkin using straightforward crochet keys and repeatable instructions. Exact finished dimensions can vary because yarn thickness, hook size, stuffing amount, and individual tension all influence the result. A medium-weight yarn with an approximately 4.0 mm to 5.0 mm crochet hook is a convenient starting combination, although you should always choose a hook that produces a fabric firm enough to contain the stuffing. You will also need fiberfill, a yarn needle, scissors, and brown or green yarn for the stem. Keep your stitches reasonably consistent throughout the project because even tension helps the pumpkin retain a balanced shape. Once you understand the basic construction, the same method can easily be adapted to make an entire collection of crochet pumpkins.
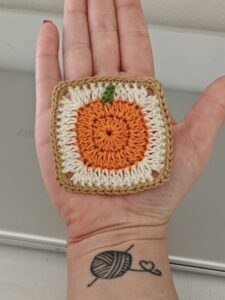
Materials, Crochet Keys, and Preparing the Pumpkin
Before beginning your Granny Square-style crochet pumpkin pattern, gather approximately 80 to 150 yards of medium-weight yarn for a small or medium pumpkin. The exact quantity depends on your chosen dimensions and yarn. Select orange, rust, cream, golden yellow, or another autumn-inspired shade for the pumpkin body. Keep a small amount of brown or green yarn nearby for the stem. You will also need a crochet hook appropriate for your yarn, polyester fiberfill, scissors, a locking stitch marker, and a tapestry needle with an eye large enough for your yarn.
The crochet abbreviations used throughout the pattern are simple: ch = chain, sl st = slip stitch, sc = single crochet, hdc = half double crochet, dc = double crochet, st = stitch, sp = space, rep = repeat, and inc = increase. When the instructions say 3 dc, work three double crochet stitches into the indicated stitch or space. When you see ch-1 sp, work into the opening created by a chain-one section from the previous round. These basic keys make the pattern easier to read and repeat.
Begin the granny-inspired center with a magic ring or, if you prefer, ch 4 and sl st into the first chain to create a ring. For Round 1, ch 3, which may count as the first double crochet, then work 2 dc into the ring, ch 1. Repeat [3 dc, ch 1] three more times. Join with a sl st at the top of the beginning chain. You should now have four groups of double crochet stitches separated by four chain spaces, creating the familiar foundation associated with a granny square.
For Round 2, slip stitch carefully until you reach the first ch-1 sp. Work ch 3, 2 dc, ch 1, 3 dc, ch 1 into that space. In each remaining chain space, work [3 dc, ch 1, 3 dc, ch 1]. Join with a slip stitch. The piece should expand while maintaining four clearly defined corners. Try not to pull the chain spaces too tightly because you will need enough room to insert the hook comfortably during subsequent rounds.
For Round 3, move into the next chain space and work [3 dc, ch 1] in each regular space. In each corner space, work [3 dc, ch 1, 3 dc, ch 1]. Continue around and join neatly. Repeat this general granny-square growth method for additional rounds until the square measures approximately 8 to 12 inches across, depending on how large you want your finished pumpkin. Remember that the dimensions are flexible because the fabric will later be folded, gathered, stuffed, and shaped.
At this stage, inspect the fabric before continuing. The square should lie reasonably flat without severe curling or excessive rippling. A small amount of movement is normal and can actually help with the later shaping process. If the fabric is extremely stiff, consider using a slightly larger hook; if the openings seem too loose for stuffing, use a slightly smaller hook. This balance between flexibility and structure is important for creating an attractive crochet pumpkin decoration with a recognizable granny-style texture.
Step-by-Step Construction and Pumpkin Shaping
Once the granny-inspired section has reached the desired size, you can begin transforming it into the pumpkin body. One practical method is to soften the square silhouette by working an edging around the entire piece. Attach the main-color yarn and work 1 sc in each stitch and chain space, placing approximately 2 or 3 sc around each corner. The objective is not to create perfectly calculated geometry but to produce an even outer edge that can later be gathered smoothly.
Work another round of sc around the edge if additional structure is needed. For a fuller decorative texture, you can alternate front-loop and back-loop stitches or use a round of half double crochet. Keep the edge flexible enough to gather. If you notice that the fabric begins to ripple dramatically, reduce the number of stitches around the corners. If it starts pulling inward too early, add an occasional increase. Crochet tension varies, so visual adjustment is often useful in dimensional projects.
Next, cut the yarn while leaving a long tail of approximately 24 to 36 inches. Thread this tail through a tapestry needle. Weave the needle through the outer stitches using a simple running motion: insert needle through stitch, skip approximately 1 stitch, insert through next stitch, repeat around. Do not tighten immediately. Instead, gradually pull the yarn so that the perimeter begins drawing toward the center. The flat granny-style fabric will naturally start forming a pouch-like shape.
Before completely closing the opening, add polyester fiberfill. Insert small portions at a time and distribute the filling around the sides rather than pushing one large clump into the middle. This produces a smoother, more balanced handmade crochet pumpkin. The pumpkin should feel full but slightly compressible. Overstuffing can stretch the granny spaces and make the filling visible, while insufficient stuffing may cause the finished pumpkin to collapse. Continue adjusting until the body has the roundness you prefer.
Pull the gathering yarn more firmly until the opening becomes small. Add a little more fiberfill through the remaining gap if necessary. Then close the top securely by passing the needle back and forth across opposite edges several times. Make a secure hidden knot and weave the yarn through the interior. At this point, you should have a rounded form, although it may resemble a ball more than a pumpkin. The characteristic pumpkin ridges are created during the next stage.
Cut a strong length of matching yarn approximately four to six times the circumference of your pumpkin. Thread it onto a sturdy tapestry needle. Insert the needle through the center from top to bottom, bring the yarn around the outside, and pass through the center again. Pull gently to create an indentation. Repeat this process at evenly spaced intervals around the body. Six to eight sections usually create an attractive crochet pumpkin shape without hiding too much of the granny-style texture.
Adding the Stem, Texture, and Custom Details
The stem gives your Granny Square-style crochet pumpkin pattern its recognizable finishing touch. Using brown, tan, olive, or dark green yarn, begin with a magic ring. Round 1: 6 sc into magic ring. Round 2: sc around = 6 sts. Continue working 6 sc around for approximately three to six rounds, depending on the desired stem height. Keeping the stitch count unchanged produces a simple narrow cylinder that works well for a small or medium pumpkin.
For a slightly thicker stem, begin with 6 sc and increase to 8 or 9 stitches during the second round. Then continue without increasing until the stem reaches the preferred length. Lightly stuff the stem if it feels too soft, but avoid making it overly firm. Leave a long yarn tail for sewing. Position the stem directly over the gathered center of the pumpkin and sew around its base using small, secure stitches. Weave the yarn tail inside the pumpkin when finished.
You can also crochet a small leaf to accompany the stem. With green yarn, ch 8. Starting in the second chain from the hook, work sl st, sc, hdc, dc, hdc, sc, sl st. This creates a simple tapered leaf. For a slightly wider leaf, crochet along the opposite side of the foundation chain using the same sequence in reverse. Fasten off with a long tail and stitch the leaf beside the stem. A green leaf provides an attractive contrast against orange, cream, or rust-colored yarn.
A curly vine is another easy customization. With green yarn, ch 20 to 30, depending on the desired length. Work 2 or 3 sc into each chain across. The extra stitches naturally cause the chain to curl into a spiral. Fasten off and attach one end near the stem. The vine can remain loose and springy, giving the pumpkin a playful handmade appearance. For larger pumpkins, make two vines of slightly different lengths to create additional visual interest.
Color selection can completely transform this granny square pumpkin crochet project. Traditional orange creates a recognizable harvest appearance, while ivory and cream offer a softer farmhouse-inspired result. Mustard, terracotta, burgundy, olive, and muted brown can create a coordinated autumn palette. You can also use several colors within the granny rounds, turning leftover yarn into decorative stripes. When combining shades, repeating one dominant color near the outer edge helps make the design look intentional rather than random.
Yarn texture also changes the finished character of the pumpkin. Smooth acrylic yarn highlights individual granny stitches and is generally easy to handle. Cotton creates crisp stitch definition and a structured body. Wool or wool-blend yarn can create a warmer, softer surface. Chunkier yarn makes a larger pumpkin quickly, while thinner yarn is useful for miniature decorations. Whatever fiber you select, ensure that the crochet fabric is sufficiently dense so the fiberfill remains securely inside the finished piece.
Finishing, Size Adjustments, FAQ, and Final Tips
The final shaping deserves attention because small adjustments can significantly improve the appearance of a Granny Square-style crochet pumpkin pattern. After attaching the stem, place the pumpkin on a flat surface and gently press the top downward. Rotate the pumpkin while redistributing the fiberfill with your fingers. Adjust each yarn ridge so that the sections appear reasonably balanced. Handmade pumpkins do not need perfect symmetry; slight variations can make each piece feel more natural and distinctive.
To create a miniature pumpkin, simply stop the granny-square section after fewer rounds and use lighter yarn with a smaller hook. A small version can become an autumn ornament, decorative bowl filler, or seasonal garland element. For a larger pumpkin, continue adding granny rounds before gathering the outer edge. Remember that increasing the square dramatically also increases the amount of stuffing required, so prepare extra fiberfill when planning oversized versions.
If you want a flatter pumpkin, use slightly less stuffing and tighten the sculpting strands more firmly. For a taller pumpkin, add more stuffing toward the center and avoid pulling the vertical shaping yarn excessively tight. These simple adjustments allow one crochet pumpkin pattern to produce several different silhouettes. Making three pumpkins in varied sizes and complementary colors can create an especially attractive seasonal arrangement for a table, shelf, mantel, or entryway.
For durability, check every finishing knot before trimming any yarn. Ends should be woven through several stitches and preferably redirected at least once so they are less likely to loosen. Pay particular attention to the stem because it may be used as a natural handling point. If the pumpkin is intended purely for decoration, ordinary secure crochet finishing is generally sufficient. Keep embellishments appropriate for the intended use, particularly when creating items that may be accessible to small children or pets.
Caring for your finished handmade crochet pumpkin depends primarily on the yarn manufacturer’s instructions. For everyday maintenance, gentle dusting or spot cleaning is often enough for seasonal decorations. Avoid aggressive scrubbing because it can distort stitches or encourage fiberfill to migrate toward the granny openings. When storing the pumpkin after autumn, keep it clean and dry. A breathable storage container can help preserve its shape until you are ready to display it again.
Most importantly, treat this pattern as a flexible foundation rather than a rigid formula. Crochet is naturally influenced by yarn, hook size, tension, stuffing, and personal technique, so two pumpkins made from identical instructions may still look slightly different. That individuality is part of the appeal of handmade projects. Once you understand the granny construction, gathering method, stuffing process, sculpting technique, and stem assembly, you can confidently modify the Granny Square-style crochet pumpkin pattern to develop your own seasonal collection.
FAQ – Frequently Asked Questions About the Granny Square-style Crochet Pumpkin Pattern
Is this crochet pumpkin pattern suitable for beginners?
Yes. A beginner who already understands chains, slip stitches, single crochet, and double crochet should be able to follow the main construction. The shaping process may feel unfamiliar at first, but it mostly involves gathering the edge and passing yarn around the stuffed body. Working slowly and checking the shape after each step makes the process much easier.
What yarn is best for a granny square-style crochet pumpkin?
Medium-weight acrylic or cotton yarn is an accessible choice because both provide good stitch visibility and are widely used for decorative crochet projects. Acrylic tends to be soft and forgiving, while cotton usually gives stronger stitch definition. Chunky yarn can also be used when you want a larger, more substantial pumpkin.
How much yarn do I need for one crochet pumpkin?
The amount depends on the size, yarn thickness, hook, and stitch tension. Approximately 80 to 150 yards can be a useful starting estimate for a small-to-medium decorative pumpkin made with medium-weight yarn. Mini pumpkins require considerably less, while oversized pumpkins may require several times that amount.
How can I make the pumpkin larger?
Continue the granny-square growth pattern for additional rounds before working the final edging and gathering the fabric. Each additional round increases the overall amount of material available for shaping. You can also use thicker yarn and a larger hook. Remember to maintain reasonably firm stitches so that the stuffing does not become excessively visible through the fabric.
How do I make deeper pumpkin ridges?
Use the long shaping strand to travel through the center of the pumpkin several times, dividing the body into equal sections. Pull each strand gradually rather than tightening one section completely before moving to the next. Deeper ridges require more tension, but pulling too firmly can distort the crochet stitches or flatten the pumpkin excessively.
Can I use leftover yarn for this pattern?
Absolutely. The granny-inspired construction makes this project especially suitable for leftover yarn. You can change colors between rounds, create alternating stripes, or use one color for the center and another for the outer rounds. Keeping yarns relatively similar in thickness will help maintain consistent tension and predictable shaping.
Why is my granny square curling or rippling?
Curling can occur when stitches are too tight, while excessive rippling can happen when there are too many stitches or increases. Check your tension and corner construction. If necessary, try a different hook size. Minor unevenness is usually not a serious problem for this project because gathering and stuffing naturally reshape the crochet fabric.
How much stuffing should I add?
Add enough fiberfill to produce a full, rounded pumpkin while keeping the crochet fabric comfortable rather than severely stretched. Insert stuffing gradually and distribute it evenly. If the granny openings become dramatically enlarged, you may have added too much. If the pumpkin collapses easily and cannot hold its shape, add a little more.
Can I make this pattern without a magic ring?
Yes. If you do not enjoy using a magic ring, chain four and join the first and last chain with a slip stitch to create a small center ring. You can then work the first groups of double crochet stitches into that ring. This alternative works well and maintains the granny-inspired appearance.
How can I make several pumpkins look different while using the same pattern?
Change the yarn color, number of granny rounds, hook size, stem height, stuffing level, and number of sculpted sections. One pumpkin might be short and wide with six deep sections, while another can be taller with eight subtle sections. Leaves and curly vines provide even more customization without changing the fundamental construction.
Conclusion
The Granny Square-style crochet pumpkin pattern brings together familiar granny crochet techniques and simple three-dimensional shaping to create a cozy autumn decoration. Throughout this tutorial, you learned how to prepare the materials, understand the essential crochet abbreviations, build the granny-inspired foundation, create additional rounds, gather and stuff the fabric, sculpt pumpkin ridges, crochet a stem, and add optional leaves and curly vines.
The pattern is also easy to personalize. By changing yarn weight, hook size, color combinations, the number of rounds, stuffing quantity, and ridge depth, you can make everything from tiny decorative pumpkins to larger statement pieces. Cream, rust, mustard, orange, olive, and brown can produce beautiful seasonal combinations, while multicolored granny rounds offer a practical way to use leftover yarn.
Once you have completed your first granny square crochet pumpkin, try experimenting with different proportions and textures. Handmade crochet becomes especially rewarding when a basic pattern becomes a starting point for your own ideas. If you make this project, leave your sincere opinion about the pattern and share your suggestions. Your experience, color ideas, adjustments, and creative variations can inspire new ways to enjoy this Granny Square-style crochet pumpkin pattern.