
A Crocheted Christmas Tree Pattern is a wonderful way to bring warmth, creativity, and handmade charm to your holiday celebrations.
One of the best things about a Crocheted Christmas Tree Pattern is its versatility. You can create a miniature tree for a shelf, a soft ornament for your Christmas tree, a decorative centerpiece for your holiday table, or a thoughtful handmade gift for friends and family.
This Crocheted Christmas Tree Pattern tutorial explains the materials, basic stitches, and step-by-step construction needed to make a charming three-dimensional tree. The instructions use common crochet techniques, including single crochet stitches, increases, decreases, and working in the round. You will also learn how to shape the tree, add a trunk, and decorate the finished piece without making the process unnecessarily complicated. The goal is to help you understand each stage clearly so you can enjoy making your own handmade Christmas decoration.
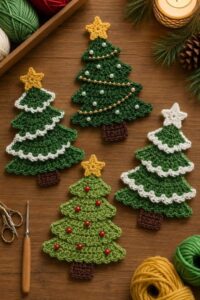
Materials, Tools, and Crochet Stitches for Your Christmas Tree
Before starting your Crocheted Christmas Tree Pattern, gather your materials and prepare a comfortable workspace. Having everything ready will make the process easier and help you maintain consistent stitches throughout the project. You do not need expensive supplies to create an attractive handmade decoration, and many crocheters can use yarn left over from previous projects.
Yarn is the first important material to choose. Medium-weight yarn is a practical option for a small decorative tree because it provides enough structure to help the finished shape hold together. Green is the traditional choice, but you can use forest green, sage, cream, white, or even a combination of colors. If you want a firmer tree, choose a yarn with good stitch definition and avoid a hook that is too large for the yarn.
You will also need a crochet hook, a pair of scissors, a yarn needle, and stitch markers. A hook that is slightly smaller than the yarn manufacturer’s usual recommendation can help create a firm fabric, although you should avoid crocheting so tightly that your hands become uncomfortable. Stitch markers are particularly helpful when working in continuous rounds because they show where each round begins and make it easier to count stitches accurately.
For the basic Crocheted Christmas Tree Pattern, you should understand a few common crochet abbreviations. These instructions use US crochet terminology: ch means chain, sc means single crochet, inc means increase by working two single crochet stitches into the same stitch, dec means decrease by joining two stitches into one, sl st means slip stitch, and MR means magic ring. If you prefer not to use a magic ring, you can begin with a small chain loop instead.
The single crochet stitch is especially useful for this project because it creates a compact fabric that helps the tree maintain its shape. The increase stitch gradually widens the bottom of the tree, while decreases can narrow the upper portion when necessary. Practice these stitches with a small sample before beginning if you are new to crochet. Consistent tension is more important than speed, and taking time to count your stitches can prevent uneven shaping later.
Finally, decide how you want to finish your decoration. Optional supplies include a small amount of polyester fiberfill, felt for a base, a wooden dowel for additional support, embroidery thread, and lightweight decorative elements. If the tree will be handled by young children or pets, avoid loose beads, small buttons, and other detachable pieces. A simple embroidered star and stitched garlands can create a festive result while keeping the decoration more secure.
Step-by-Step Crocheted Christmas Tree Pattern Instructions
Begin your Crocheted Christmas Tree Pattern by creating the upper tip of the tree. Using green yarn, make a magic ring and work four single crochet stitches into the ring. Pull the ring closed and place a stitch marker in the first stitch. You should now have a small starting circle that will form the narrow top of your tree. If you find the magic ring difficult, make two chains and work four single crochet stitches into the second chain from the hook.
For the second round, work one single crochet stitch into each stitch around, giving you four stitches. In the third round, increase in every stitch by working two single crochet stitches into each one, resulting in eight stitches. Continue working in a spiral, moving the stitch marker to the first stitch of every new round. This beginning creates a compact tip that will gradually develop into the tree’s upper section.
In the fourth round, work one single crochet into each of the eight stitches. In the fifth round, repeat the following sequence around: one single crochet in the first stitch, then an increase in the next stitch. You will finish with twelve stitches. For the sixth round, work one single crochet in every stitch. Alternating plain rounds with increase rounds helps the tree widen gradually instead of developing an overly wide or floppy shape.
For the seventh round, work one single crochet in each of the first two stitches, followed by an increase in the next stitch. Repeat this sequence around to reach sixteen stitches. Work the eighth round without increases, placing one single crochet into each stitch. In the ninth round, work one single crochet into each of the first three stitches, then increase in the next stitch. Repeat around to reach twenty stitches. If the stitch count does not divide evenly because of a variation in your starting stitches, distribute the increases as evenly as possible.
Continue shaping the tree by working a plain round followed by an increase round. For the next increase round, work one single crochet into each of the first four stitches, then increase in the next stitch, repeating around to reach twenty-four stitches. Work one plain round of twenty-four single crochet stitches. Repeat the same principle, adding another single crochet between increases in each subsequent increase round. As the circumference grows, the piece will begin to resemble a tapered cone.
To make a more substantial tree, continue increasing until you reach approximately thirty-six to forty-eight stitches, depending on your yarn, hook, and preferred finished size. Work two or three plain rounds between increase rounds if you want a taller, slimmer tree. If you prefer a shorter, fuller shape, increase more frequently. The most important part of this Crocheted Christmas Tree Pattern is maintaining a gradual slope and checking the shape as you work rather than following a stitch count without considering the fabric.
Once the tree reaches your desired width, work several rounds without increases. This creates a more stable middle section and allows the tree to develop a recognizable silhouette. For a three-dimensional cone, continue working downward with occasional increases near the lower edge, then finish with a wider base. If you prefer a simple flat tree, stop increasing earlier and continue until you have a triangular-looking piece when viewed from the side. The construction method can be adjusted to suit your decorating plans.
To turn the crocheted cone into a fuller three-dimensional decoration, make a second matching cone or work a single cone that can be filled and closed at the bottom. For the two-piece option, place the pieces together with their right sides facing outward and join the edges using single crochet stitches. Leave a small opening, add a modest amount of polyester fiberfill, and then close the remaining gap. Distribute the stuffing evenly without packing it too tightly, since excessive filling can distort the stitches.
Next, create the trunk if you want your tree to stand upright. With brown yarn, make a magic ring and work six single crochet stitches into it. Increase evenly in the following round if needed to create a small circular base. Continue working several rounds of single crochet stitches to form a short cylinder. Lightly stuff the trunk and sew it securely to the bottom of the tree. For a larger decoration, you can insert a firmly secured wooden support, making sure that no sharp ends are exposed.
Finish the basic structure by weaving in all loose yarn ends with a yarn needle. Check the seams, adjust the stuffing, and make sure the tree sits as evenly as possible. If the decoration needs a flatter bottom, attach a small circle of felt or crochet a flat base and sew it in place. Your Crocheted Christmas Tree Pattern is now ready for embellishment. Take a moment to examine the shape from different angles before adding decorations, because small adjustments at this stage can make the finished tree look more balanced.
Decorating, Customizing, and Finishing Your Crochet Christmas Tree
Decorating is where your Crocheted Christmas Tree Pattern becomes a personal holiday creation. You can leave the tree plain for a minimalist style or add carefully chosen details to make it more festive. Embroidered lines can represent garlands, while small French knots or simple stitched dots can imitate ornaments. If you are making a rustic decoration, natural shades and a simple brown trunk can complement other handmade holiday items.
A crocheted star is a lovely finishing touch. You can make a small five-pointed star separately and sew it firmly to the tip of the tree. Alternatively, embroider a star using yellow or gold yarn. If you prefer a softer appearance, choose cream or white yarn for the star. Keep the decoration proportional to the tree so that it does not pull the tip out of shape or make the finished piece difficult to position.
Color combinations can change the entire appearance of your project. Dark green with gold details gives a traditional festive effect, while white with silver embroidery creates a winter-inspired design. Red and cream can complement farmhouse-style decorations, and several shades of green can give the tree a layered appearance. You can also use small amounts of leftover yarn to make different versions of the same Crocheted Christmas Tree Pattern, creating a coordinated collection for your home.
Texture is another way to make your tree distinctive. Working some stitches in the back loop only can create subtle horizontal ridges that resemble branches. You can also sew narrow crocheted chains around the tree to imitate garlands. If you want a layered appearance, make small crocheted leaf shapes and attach them in horizontal rows. Secure each decorative element carefully so that the finished piece remains neat and durable during seasonal storage.
The intended use of the tree should guide your finishing choices. A small, lightweight version can work as a hanging ornament if you add a securely attached yarn loop. A larger stuffed tree is better suited to a tabletop or shelf, especially when its base is wide enough to support it. For a centerpiece, consider making several trees in different heights and arranging them together. If you want the decoration to stand upright, test its balance on a flat surface before displaying it.
Careful finishing makes a noticeable difference in the final result. Weave in yarn ends instead of leaving them exposed, trim loose fibers, and check that the base and decorative pieces are secure. Store the tree in a clean, dry container after the holiday season, keeping it away from sharp objects that could snag the yarn. With appropriate care, a handmade Crocheted Christmas Tree Pattern can become a decoration you bring out year after year, or a thoughtful gift that carries the personal touch of handmade work.
Troubleshooting, Frequently Asked Questions, and Helpful Crochet Tips
One common challenge when making a Crocheted Christmas Tree Pattern is getting the shape to look even. If your tree becomes wavy or ruffled, you may be increasing too frequently or using too many increases in one round. If the cone becomes too narrow or curls inward unexpectedly, you may need to add increases more often. Check your stitch count after every increase round and compare the shape with your intended design. Small adjustments are easier to make before you finish the entire piece.
Another frequent problem is a visible gap between stitches. This can happen when the hook is too large, your tension is loose, or the stuffing stretches the fabric. Try using a smaller hook or adjusting your tension slightly. If you are making a stuffed tree, add the filling in small portions and distribute it evenly. The goal is to create a firm but flexible shape without stretching the stitches or making the seams difficult to close.
If your tree leans to one side, check whether the increases are evenly distributed and whether the base is level. A slightly uneven trunk or an irregular seam can also affect balance. You can improve stability by using a wider base, reducing excess stuffing near the bottom, or attaching a flat felt circle. For a taller decoration, a concealed support can help, provided it is securely installed and appropriate for the intended setting.
Beginners should not feel pressured to make every stitch perfectly uniform on the first attempt. Crochet tension often improves with practice, and small handmade variations can add character to a seasonal decoration. Work in a well-lit area, take breaks when your hands feel tired, and use stitch markers to keep track of rounds. If you lose your place, count the stitches before continuing instead of guessing. This simple habit can save time and help you achieve a more consistent result.
Frequently Asked Questions
1. Is this Crocheted Christmas Tree Pattern suitable for beginners?
Yes. The project uses basic stitches such as single crochet, increases, and decreases. Beginners who are comfortable making a magic ring and working in continuous rounds can follow the instructions. If you are completely new to crochet, practice single crochet and stitch counting with a small sample first. You can also simplify the design by making a flat tree instead of a stuffed three-dimensional version.
2. What type of yarn is best for a crochet Christmas tree?
Medium-weight yarn is a practical choice for a small decorative tree because it is easy to handle and provides good stitch definition. Acrylic, cotton, and wool-blend yarns can all work, depending on the appearance and firmness you want. Cotton may create a more defined surface, while acrylic offers a wide range of festive colors. Choose a yarn that works comfortably with your hook and produces fabric dense enough for your intended project.
3. How much yarn do I need for a Crocheted Christmas Tree Pattern?
The amount depends on the tree’s height, width, yarn weight, and whether you make one cone or two joined pieces. A small ornament may require only a modest amount of yarn, while a large stuffed decoration needs considerably more. If you are using leftover yarn, begin with a small project and keep extra yarn available for the trunk, star, and decorative details.
4. How can I make my crochet Christmas tree stand upright?
A wide, level base is the first step toward better stability. Use firm stitches, distribute stuffing evenly, and make sure the trunk is attached securely. For a larger tree, a concealed support or a flat base can help it remain upright. Always test the finished decoration on a stable surface before displaying it.
5. Can I make this pattern in different sizes?
Yes. You can adjust the size by changing your yarn weight, hook size, and the number of increase rounds. More rounds generally create a taller tree, while additional increases create a wider shape. Remember that changing the yarn and hook may also change the fabric’s firmness, so check the shape as you work rather than relying on height alone.
6. How do I decorate a crocheted Christmas tree without using beads?
Embroidery is an excellent alternative to small decorative pieces. Use contrasting yarn to stitch garlands, stars, dots, or simple geometric patterns onto the surface. You can also attach crocheted flowers, leaves, or small bows. These options create a festive appearance while avoiding loose beads and similar components that may be unsuitable around small children or pets.
7. Why does my crochet Christmas tree look wavy?
A wavy edge often indicates that too many stitches have been added too quickly. Review your increase rounds and make sure you are following the intended stitch sequence. Working a plain round between increase rounds can help create a smoother slope. If the problem continues, try a slightly smaller hook or adjust your stitch tension.
8. How should I wash and store my crochet Christmas tree?
Care depends on the yarn and any added materials. Check the yarn’s care instructions before washing. For many small decorations, gentle spot cleaning with a slightly damp cloth is sufficient. Allow the piece to dry completely before storing it. Keep it in a clean, dry container away from moisture, direct sunlight, and objects that could catch on the yarn.
9. Can I use this Crocheted Christmas Tree Pattern to make handmade gifts?
Absolutely. Small crochet trees make thoughtful gifts for friends, family members, teachers, and craft enthusiasts. You can personalize each one with a favorite color, embroidered initials, or a simple star. If you are giving the decoration to someone with young children or pets, avoid detachable embellishments and make sure all attachments are secure.
10. What can I do if I do not want to make a stuffed tree?
You can adapt the design into a flat triangular tree or create two flat tree shapes and join them around the edges without stuffing. Another option is to crochet a decorative tree panel and attach it to a card, fabric backing, or wall hanging. These alternatives use similar basic stitches but require less shaping and finishing.
Conclusion
Creating a Crocheted Christmas Tree Pattern is a rewarding way to combine creativity, practical crochet skills, and holiday decorating. Throughout this guide, you learned how to choose suitable yarn and tools, understand the essential stitches, build a tapered tree shape, add a trunk, and finish the decoration neatly. You also explored ways to customize the design with different colors, embroidered garlands, crocheted stars, and other handmade details.
The most important lesson is to work patiently, count your stitches, and adjust the shape as needed. Whether you make a small ornament or a larger stuffed centerpiece, your finished tree can reflect your own style and become part of your seasonal traditions. Remember that practice helps improve stitch consistency, and every new project offers an opportunity to learn something useful.
Now it is your turn to create your own Crocheted Christmas Tree Pattern! Share your honest opinion about this tutorial and let us know which part you found most helpful. Do you prefer traditional green trees, modern neutral colors, or colorful decorations? Leave your suggestions and ideas for future crochet patterns, and inspire other crafters to enjoy the beauty of handmade Christmas decorations.