
Simple fabric bag pattern projects are among the most rewarding sewing ideas for beginners and experienced crafters alike.
Making your own fabric bag is not only enjoyable but also a smart way to personalize your accessories. You can select your favorite fabrics, combine colors that reflect your personality, and even reuse fabric scraps to create something beautiful and functional.
Throughout this tutorial, you will learn how to choose the right materials, prepare your fabric, cut every piece accurately, assemble the bag step by step, and add professional finishing touches. This detailed guide has been written in clear, beginner-friendly language while following modern SEO practices and maintaining content suitable for Google AdSense policies. By the end, you will have the confidence to complete your own beautiful Simple fabric bag pattern and customize future projects with ease.
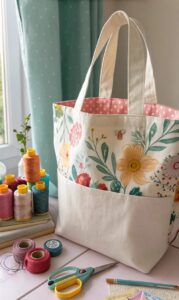
Materials and Preparing Your Simple Fabric Bag Pattern
Before starting your project, gather all of your sewing supplies. Having everything organized makes the sewing process much smoother and helps prevent mistakes. Cotton fabric is one of the best choices because it is stable, easy to sew, and available in countless beautiful prints.
For a standard tote-sized bag, prepare two rectangles of exterior fabric measuring approximately 16 x 18 inches. Cut two identical lining pieces and, if desired, two interfacing pieces to provide extra structure. Interfacing is optional but highly recommended if you want a firmer finished bag.
Next, prepare two long strips for the handles. A common size is 4 x 24 inches before folding. These measurements can easily be adjusted if you prefer shorter shoulder straps or longer crossbody-style handles.
Wash and iron your fabric before cutting. Prewashing helps prevent future shrinking, while pressing removes wrinkles that could affect cutting accuracy. Smooth fabric always produces more professional-looking results.
Use a rotary cutter or sharp fabric scissors together with a quilting ruler for clean, straight edges. Accurate cutting ensures every piece aligns correctly during assembly and reduces frustration later in the project.
Finally, organize all your fabric pieces into separate stacks. Keeping exterior panels, lining panels, handles, and interfacing together makes the sewing process more efficient and prevents accidentally sewing the wrong pieces together.
Cutting and Sewing the Bag Step by Step
Begin by attaching the interfacing to the wrong side of the exterior fabric according to the manufacturer’s instructions. This simple step significantly improves the bag’s durability while helping it maintain its shape during everyday use.
Place the two exterior pieces right sides together. Pin along both sides and the bottom edge, leaving the top completely open. Sew using a 3/8-inch or 1/2-inch seam allowance depending on your preference.
Repeat the exact process for the lining pieces. However, leave a 4-inch opening along the bottom seam of the lining. This opening will later allow you to turn the finished bag right side out.
To create a flat-bottom bag, flatten each lower corner so the side seam aligns with the bottom seam. Measure approximately 2 inches from the corner point and draw a straight line across. Sew along this line before trimming away the excess fabric. Repeat on all four corners.
Now prepare the handles by folding each strip lengthwise with right sides together. Sew along the long edge, turn each handle right side out, and press them flat with an iron. Topstitch both sides for added strength and a professional finish.
Attach the handles evenly to the top edge of the exterior bag. Pin carefully to keep both handles symmetrical. Secure them with a short line of stitching before continuing to the next step.
Assembling and Finishing Your Fabric Bag
Insert the exterior bag into the lining so that the right sides face each other. Carefully match the side seams and pin around the entire top opening. Make sure the handles are tucked neatly between both layers.
Sew completely around the top edge using a consistent seam allowance. Remove pins as you sew to maintain even stitching and avoid damaging your sewing machine needle.
Reach through the opening left in the lining and gently pull the entire bag right side out. Take your time during this step to avoid stretching the seams or twisting the handles.
Close the opening in the lining using either a hand ladder stitch or a narrow machine stitch close to the folded edge. Both methods produce a clean finish, although the invisible hand stitch offers the most polished appearance.
Push the lining down inside the bag and carefully shape every corner using a turning tool or the blunt end of a pencil. Press the entire bag thoroughly with an iron to flatten all seams.
Complete the project by sewing a neat topstitch approximately 1/8 inch below the upper edge. This final row of stitching strengthens the opening, keeps the lining securely in place, and gives your Simple fabric bag pattern a professional appearance.
Creative Ideas and Tips for Customizing Your Simple Fabric Bag Pattern
One of the greatest advantages of a Simple fabric bag pattern is its versatility. Once you master the basic construction, you can personalize nearly every detail to create unique designs for different occasions.
Experiment with different fabrics such as linen, canvas, denim, quilting cotton, or lightweight upholstery fabric. Each material changes the appearance and structure of the finished bag while allowing you to develop new sewing skills.
Add exterior pockets before assembling the bag if you want extra storage for keys, phones, or small accessories. Interior pockets are equally useful and can be customized with multiple compartments.
Decorate your bag using fabric appliqués, embroidery, decorative quilting, lace trim, contrasting topstitching, or colorful labels. Small decorative details can transform a simple project into a truly personalized handmade accessory.
If you plan to carry heavier items, reinforce the handle attachment points by sewing an “X” inside a square where each handle connects to the bag. This professional technique greatly improves durability for everyday use.
As your confidence grows, experiment with magnetic snaps, zipper closures, boxed bottoms of different depths, adjustable straps, or decorative piping. Each new project builds your experience while expanding the possibilities of your favorite Simple fabric bag pattern.
Frequently Asked Questions
Is this Simple fabric bag pattern suitable for beginners?
Yes. The project uses straight seams, simple construction methods, and basic sewing techniques, making it ideal for beginners while still producing professional-looking results.
What fabric works best?
Medium-weight quilting cotton, canvas, linen, and lightweight denim are excellent choices. They are durable, easy to sew, and hold their shape well.
Do I need interfacing?
Interfacing is optional, but it provides additional stability and helps the bag maintain a crisp appearance, especially if you plan to carry heavier items.
Can I make the bag larger?
Absolutely. Simply increase the dimensions of every fabric piece while keeping all corresponding pieces identical. The construction process remains exactly the same.
How long does the project usually take?
Most beginners can complete the bag in approximately two to three hours. More experienced sewists may finish it in less than ninety minutes.
Can I wash the finished bag?
Yes. If you prewash your fabric before sewing, the finished bag can usually be machine washed on a gentle cycle and air dried to preserve its appearance.
What sewing machine needle should I use?
A universal size 80/12 or 90/14 needle works well for most cotton and canvas fabrics. Choose a stronger needle when sewing thicker materials like denim.
Can I sell bags made from this pattern?
Yes. Handmade bags created from your own work can generally be sold at craft fairs, online marketplaces, or local shops, especially when you personalize the design and construction.
Conclusion
Creating a Simple fabric bag pattern is an enjoyable project that combines creativity, practical sewing skills, and endless opportunities for customization. Throughout this guide, you learned how to select suitable materials, prepare and cut fabric accurately, sew the exterior and lining, construct sturdy handles, assemble every section correctly, and apply professional finishing techniques that improve both durability and appearance.
With practice, this basic design becomes the perfect foundation for many future sewing projects. You can experiment with different sizes, fabrics, pockets, closures, and decorative details to create bags that perfectly suit your style or make thoughtful handmade gifts for family and friends.
I hope this tutorial has inspired you to start your next sewing project with confidence. If you found this guide helpful, please leave your honest opinion, share your experience, and let us know your suggestions for future tutorials. Your feedback helps improve future sewing guides and inspires other makers to begin their own creative journey with a beautiful Simple fabric bag pattern.