
Drawstring Fabric Pouch Pattern is one of the most practical sewing projects you can make, whether you are a beginner learning basic techniques or an experienced crafter looking for a quick and satisfying creation.
If you are looking for a sewing project that requires only a small amount of fabric while producing a professional-looking result, this project is an excellent choice.
Throughout this guide, you will learn how to complete a beautiful Drawstring Fabric Pouch Pattern step by step, from selecting materials to sewing the final drawstring casing. Along the way, you’ll discover useful sewing tips, finishing techniques, and creative ideas that will help you achieve a polished project that you can proudly use or give as a thoughtful handmade gift.
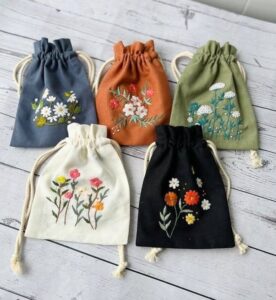
Materials and Preparing Your Drawstring Fabric Pouch Pattern
Before starting your Drawstring Fabric Pouch Pattern, gather all the necessary materials to make the sewing process smooth and enjoyable. Proper preparation saves time and helps produce cleaner results.
For this project, choose medium-weight cotton fabric because it is easy to sew and maintains its shape well. Linen blends and lightweight canvas are also excellent choices if you prefer a sturdier pouch.
You will also need coordinating thread, fabric scissors, sewing pins or clips, a ruler, fabric chalk, a sewing machine, an iron, and a safety pin or bodkin for threading the drawstring.
Cut two outer fabric rectangles measuring approximately 10 x 12 inches. Cut two matching lining pieces using the same dimensions. These measurements can easily be adjusted if you want a larger or smaller pouch.
For the drawstring, prepare two cords, ribbons, cotton ropes, or fabric ties approximately 24 inches long. Using two drawstrings allows the pouch to close smoothly from both sides.
Before sewing, press all fabric pieces with an iron. Crisp, flat fabric makes accurate cutting and sewing much easier while improving the overall appearance of the finished pouch.
Step-by-Step Sewing Instructions
Begin by placing the two outer fabric pieces right sides together. Pin around the sides and bottom, leaving the top edge open.
Using a ¼-inch seam allowance, sew both side seams and the bottom seam. Backstitch at the beginning and end to reinforce the stitches.
Repeat exactly the same process with the lining pieces. Leave a small 3-inch opening in the bottom seam of the lining so the pouch can be turned right side out later.
Trim the seam allowances and carefully clip the bottom corners diagonally without cutting through the stitches. This helps create neat corners after turning.
To form the boxed bottom, pinch each lower corner so the side seam aligns with the bottom seam, creating a triangle. Measure about 1 inch across the point and stitch straight across. Trim away the excess fabric. Repeat for all four corners if desired.
Next, prepare the drawstring casing by folding the top edge of the outer pouch down approximately ½ inch toward the wrong side and pressing it neatly with the iron.
Assembling the Drawstring Fabric Pouch
Turn the outer pouch right side out while keeping the lining wrong side out. Insert the outer pouch inside the lining so that the right sides are facing each other.
Align the side seams carefully and pin around the entire top opening. Accurate alignment gives the finished pouch a professional appearance.
Sew completely around the top edge using a consistent seam allowance. Take your time to keep the stitching even all the way around.
Pull the pouch through the opening left in the lining. Once everything has been turned right side out, gently push out all corners using a blunt turning tool.
Close the opening in the lining with a neat machine stitch close to the edge or use an invisible ladder stitch if you prefer a hand-sewn finish.
Push the lining down inside the pouch and press the entire project carefully. Topstitch around the upper edge for extra durability and a crisp, finished look.
Finishing Touches and Creative Customization Ideas
Now it is time to create the drawstring channels. Sew two parallel lines around the upper section of the pouch, leaving enough space between them for the cords to slide freely.
Using a safety pin, thread one drawstring through the entire channel, bringing both ends out on the same side. Tie the ends securely with a simple knot.
Repeat the process from the opposite side using the second drawstring. When both cords are pulled, the pouch should close evenly from the center.
One of the greatest advantages of a Drawstring Fabric Pouch Pattern is how easy it is to personalize. Add lace trim, decorative buttons, embroidery, appliqué, quilting, or fabric labels to create a unique design.
You can also experiment with seasonal fabrics, floral prints, holiday themes, children’s fabrics, or elegant neutral colors depending on the intended use of the pouch.
These handmade pouches are perfect for storing jewelry, makeup, sewing notions, crochet accessories, gift wrapping, travel essentials, baby items, charging cables, or small keepsakes. Because they are reusable, they also make an eco-friendly alternative to disposable gift bags.
FAQ
Is this Drawstring Fabric Pouch Pattern suitable for beginners?
Yes. This project uses basic straight seams and simple construction, making it an excellent beginner-friendly sewing pattern.
What fabric works best?
Cotton quilting fabric is the most popular option because it is easy to sew, durable, and available in countless prints.
Can I make different sizes?
Absolutely. Simply adjust the size of the rectangles while following the same construction method.
Do I need a sewing machine?
A sewing machine speeds up the process, but the pouch can also be sewn entirely by hand using small, strong backstitches.
Can I wash the finished pouch?
Yes. Cotton pouches can usually be machine washed on a gentle cycle and air dried to maintain their shape.
What can I use instead of ribbon for the drawstring?
Cotton cord, braided rope, twill tape, leather cord, fabric ties, or handmade fabric strips all work beautifully.
Conclusion
Making a Drawstring Fabric Pouch Pattern is an enjoyable sewing project that combines creativity with everyday practicality.
In this tutorial, you learned how to select suitable materials, prepare and cut the fabric, sew the outer pouch and lining, assemble the pieces, create a smooth drawstring casing, and add professional finishing touches. With just a few basic sewing techniques, you can create beautiful reusable pouches for organizing your belongings, wrapping gifts, or decorating your home. As you become more confident, you can experiment with different sizes, fabrics, colors, quilting details, and embellishments to make every pouch uniquely yours.
I hope this guide inspires your next sewing project. If you enjoyed this tutorial, please leave your honest opinion in the comments and share your suggestions. Your feedback is always appreciated and helps inspire future sewing patterns and creative ideas.